
Основные параметры
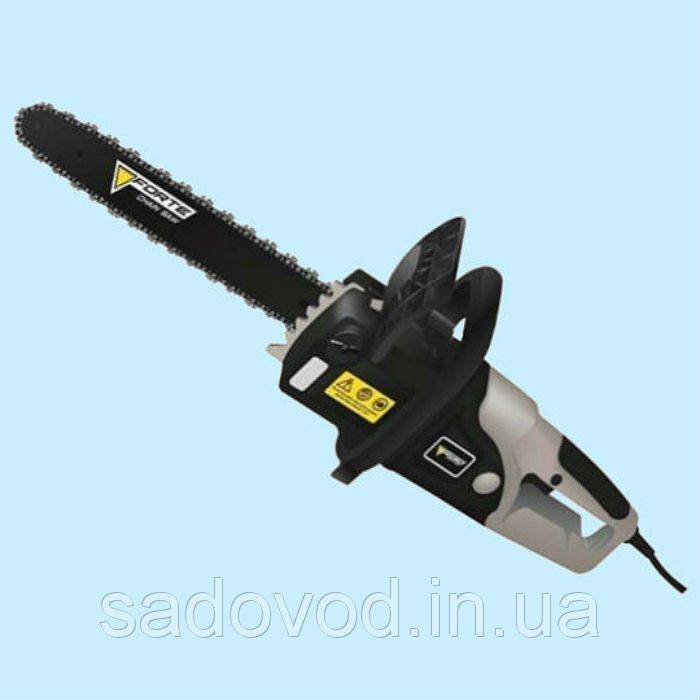
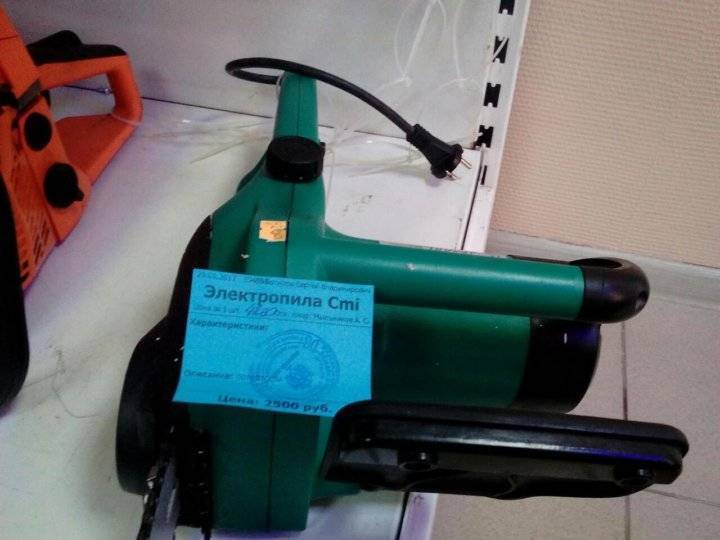
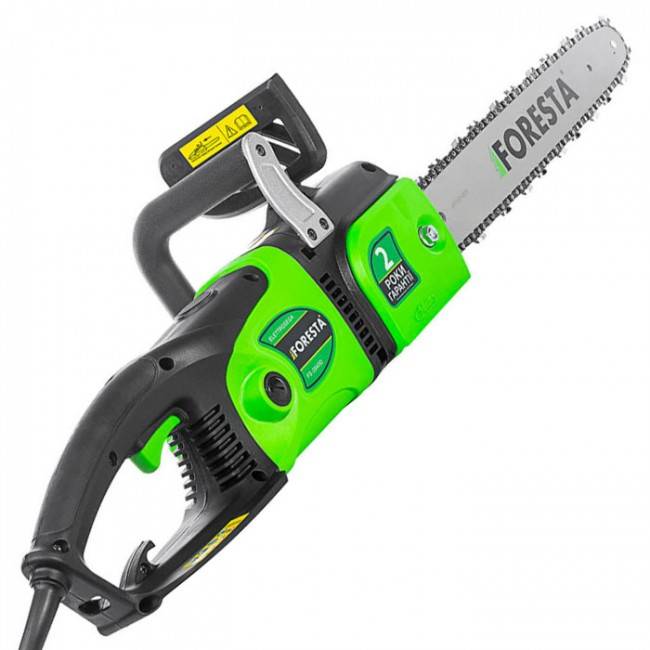
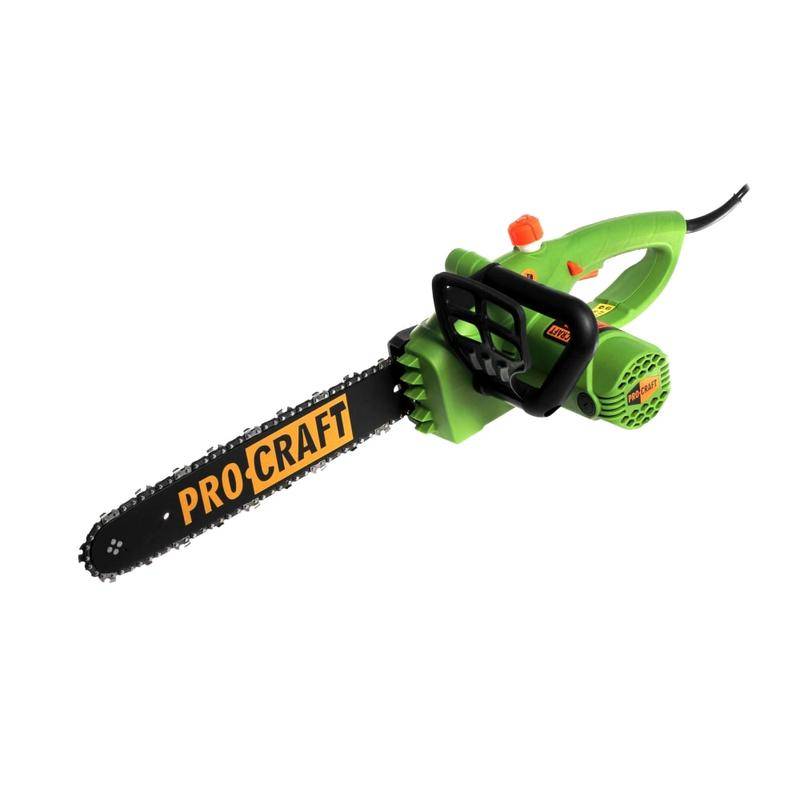
Электрическая или аккумуляторная цепная пила – какой вариант считается лучшим? Питающиеся от электросети приборы считаются более мощными, надежными и практичными. Характеризуются компактностью и простотой эксплуатации. Зачастую маленькая электропила имеет тихий ход и высокую производительность. Аккумуляторного типа рабочий инструмент не требует привязки к электросети. Прибор работает от съемной/встроенной батареи.
Рекомендуем иметь под рукой запасной аккумулятор. Наличие второй батареи позволяет выполнить больший объем работ. Выбирая между электрическим и аккумуляторным инструментами, лучше ориентироваться на личные предпочтения и частоту эксплуатации пилы.
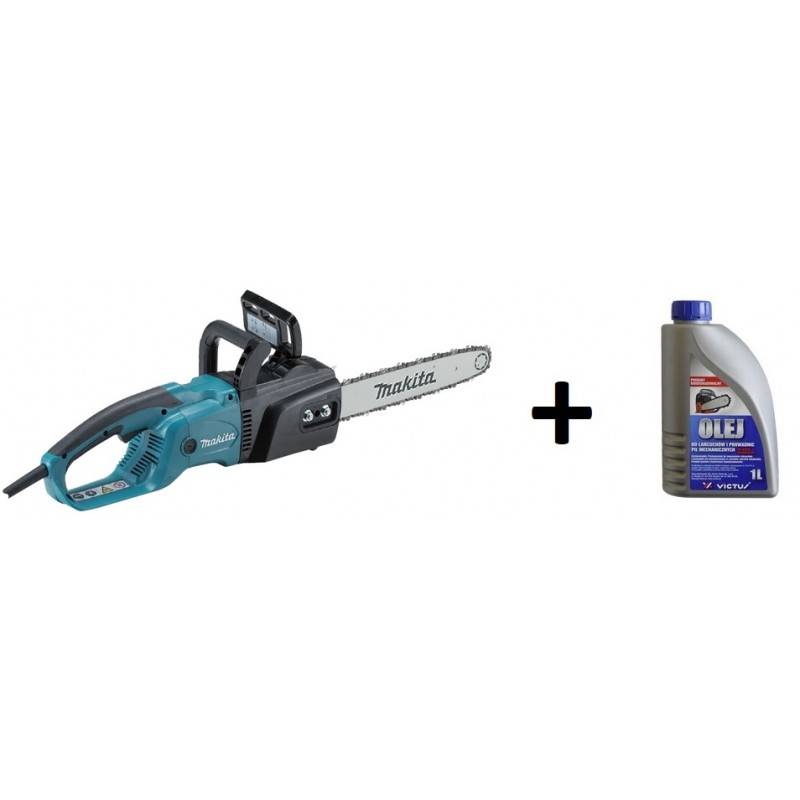
В преобладающем большинстве электрические цепные пилы характеризуются легкостью, компактностью и маневренностью. Вес такого инструмента не превышает 5–6 кг. Благодаря малому удельному весу электропилу можно использовать для распила дерева на высоте.
При выборе инструмента рекомендуется обращать внимание на продолжительность беспрерывной работы, объем емкости для масла, наличие системы плавного запуска и индикатора уровня заряда батареи. Электропила с ранцевым ремнем считается более удобной в пользовании
Мощность
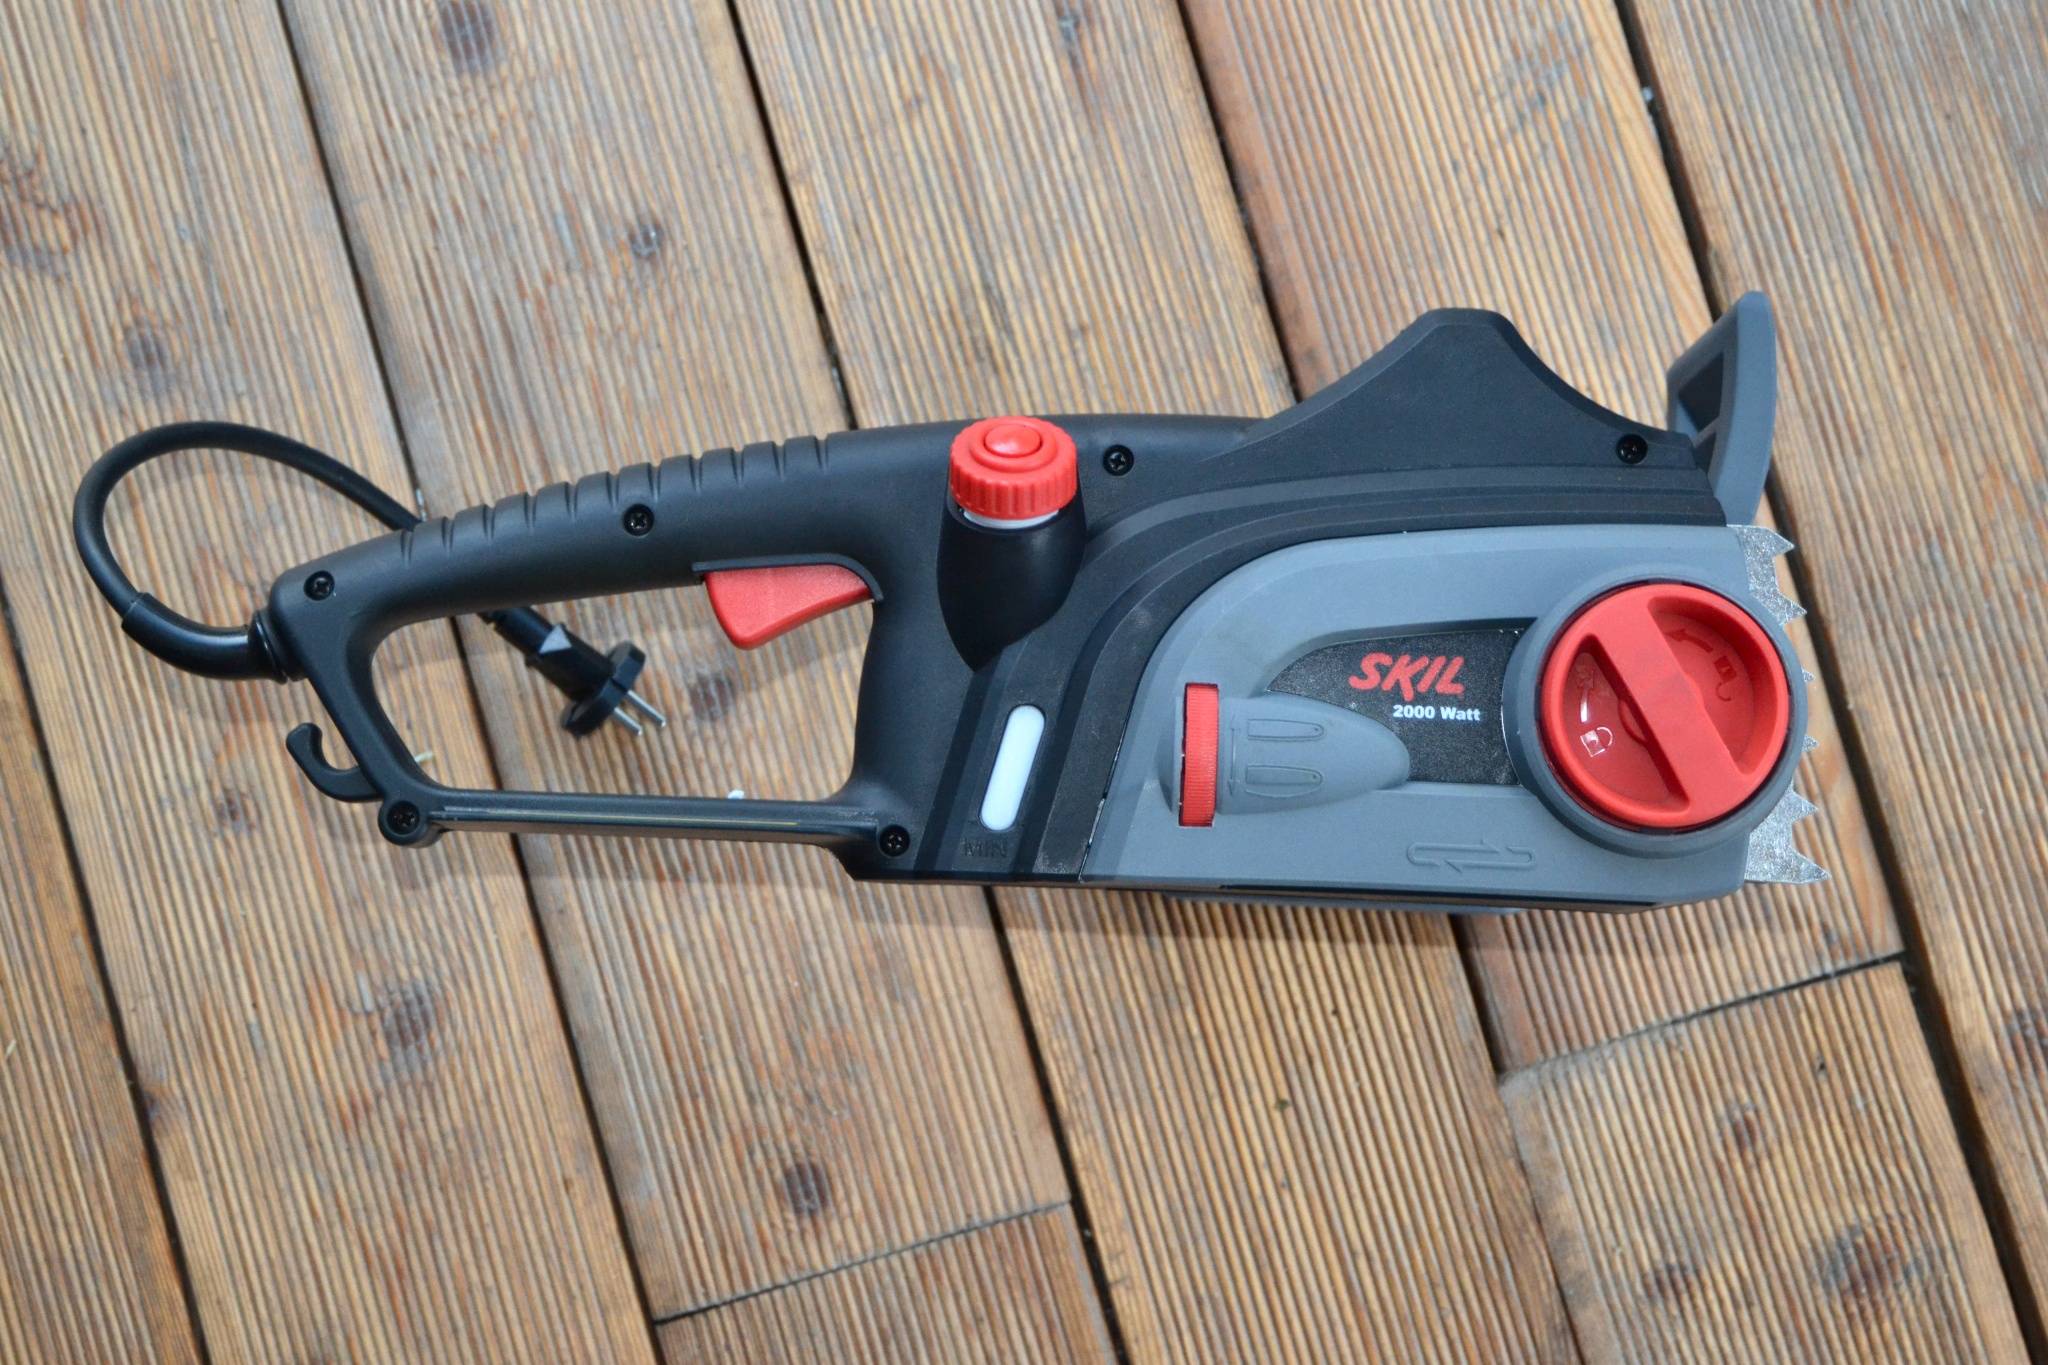
Однако главным критерием выбора рабочего инструмента является мощность. Чем выше мощность двигателя, тем больше производительность рабочего инструмента. Так, профессиональные пилы мощностью от 2 кВт применяют для распила бревен диаметром от 30 см и более. Агрегаты мощностью 1500–2000 Вт – оптимальное решение для бытового пользования. Мощности такого прибора хватает для выполнения основных задач по хозяйству.
Регулирование цепи
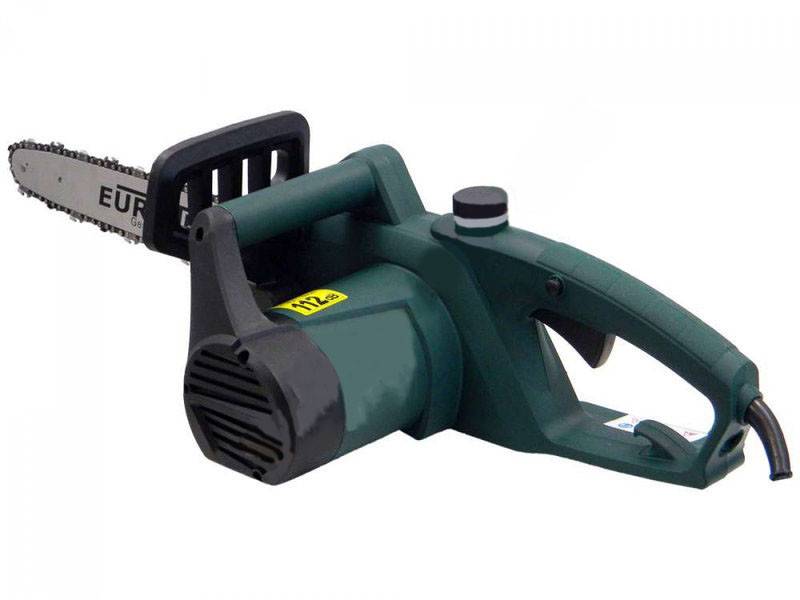
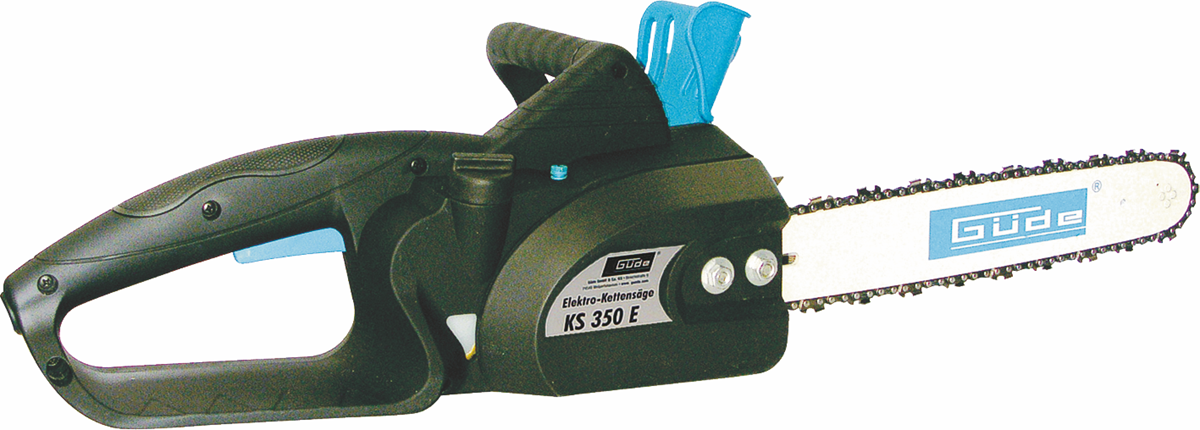
Электропила бытового пользования имеет низкопрофильную цепь. Несмотря на среднюю производительность, низкопрофильная цепь считается более безопасной в эксплуатации. Вибрационный режим и шумовой эффект минимальны.
Регулирование натяжение цепи выполняется классическим или упрощенным методом. В первом варианте не обойтись без плоской отвертки. Для регулирования цепи нужно послабить или, наоборот, подтянуть крепящие винты. Упрощенный вариант подразумевает регулировку цепи посредством смещения специального ползунка.
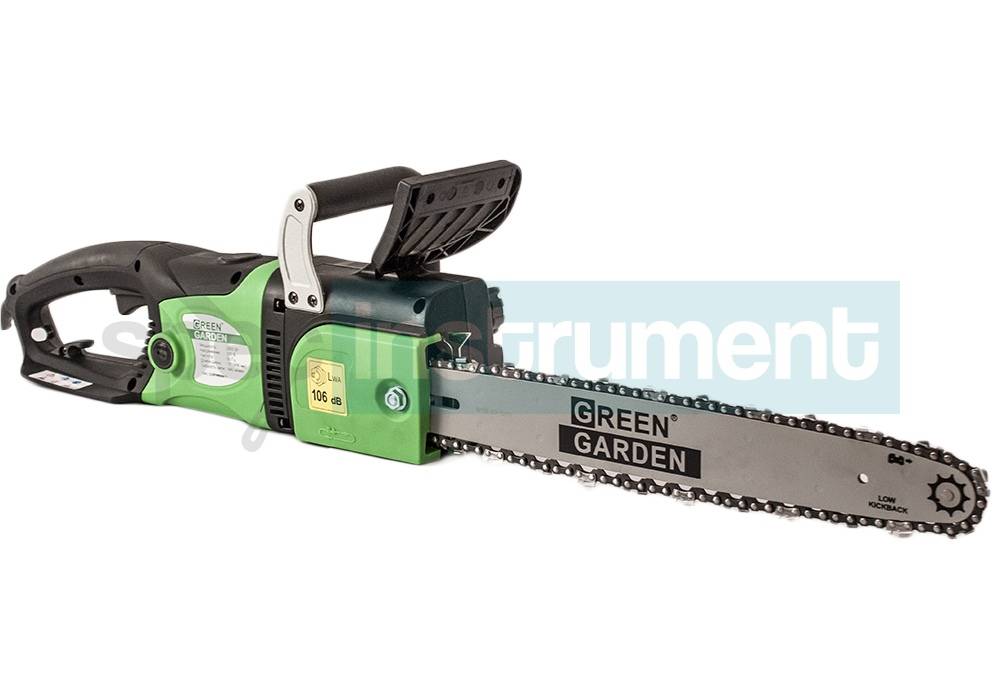
Длина шины
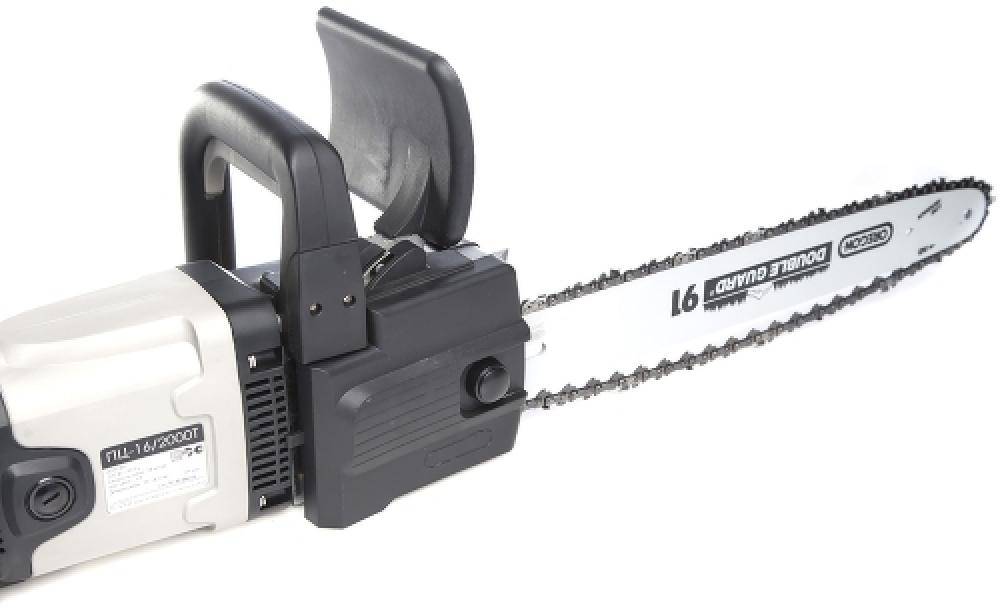
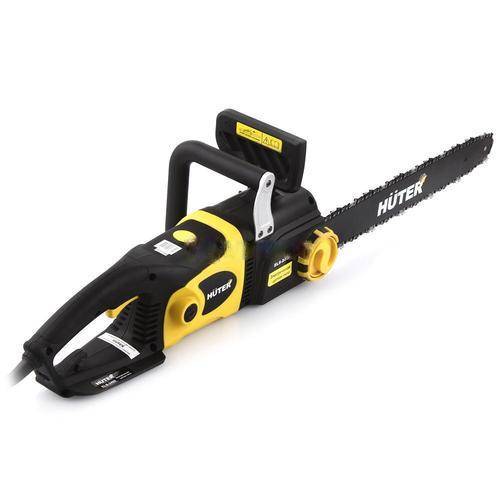
Глубина пропила зависит от длины шины. Чем выше показатель этого параметра, тем больше функциональность прибора. При выборе длины шины нужно учитывать и мощность прибора. Легкая пилка с длинной шиной не только неудобна, но и небезопасна в использовании.
Глубина пропила зависит от длины шины и особенностей зубьев цепи
Согласно заявлениям ведущих производителей электрических пил, идеальное соотношение мощности и длины шины может выглядеть следующим образом:
- мощность от 2 кВт и больше – длина шины от 40 см;
- мощность 1500–2000 Вт – длина шины порядка 35 см;
- мощность менее 1500 Вт – длина шины около 30 см.
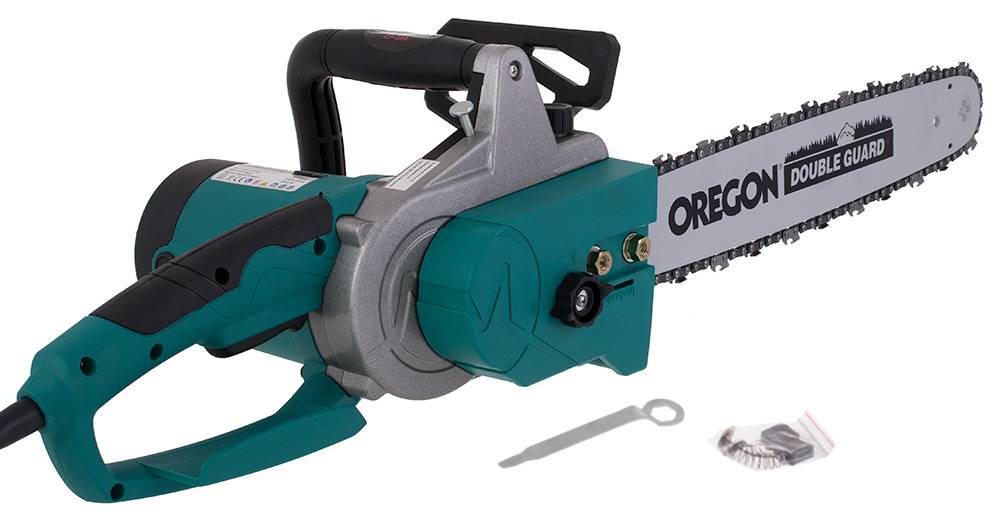
Не менее важно знать шаг шины. Шаг 6,3 мм гарантирует аккуратность и чистоту среза. Шаг 9,3 мм обеспечивает производительность выше среднего, а 9,5 мм – подходит для профессиональных высокомощных электропил
Шаг 9,3 мм обеспечивает производительность выше среднего, а 9,5 мм – подходит для профессиональных высокомощных электропил.
Плавный пуск
Зачем нужна система плавного пуска, спросите вы? При запуске пилы двигатель подает большой ток, происходит рывок цепи, сопровождающийся обратной отдачей. Предупредить обратный удар помогают системы плавного запуска двигателя.
Безопасность
Цепная пила является потенциально опасным рабочим инструментом. Во избежание получения травм нужно строго следовать инструкции пользования прибором.
Наличие блокировки случайного включения минимизирует риск внепланового запуска пилы. Встроенный антивибрационный режим снижает уровень нагрузки на руки и повышает безопасность инструмента. Инерционный тормоз останавливает цепь сразу же по выключении двигателя.
Кнопка блокировки от случайного включения
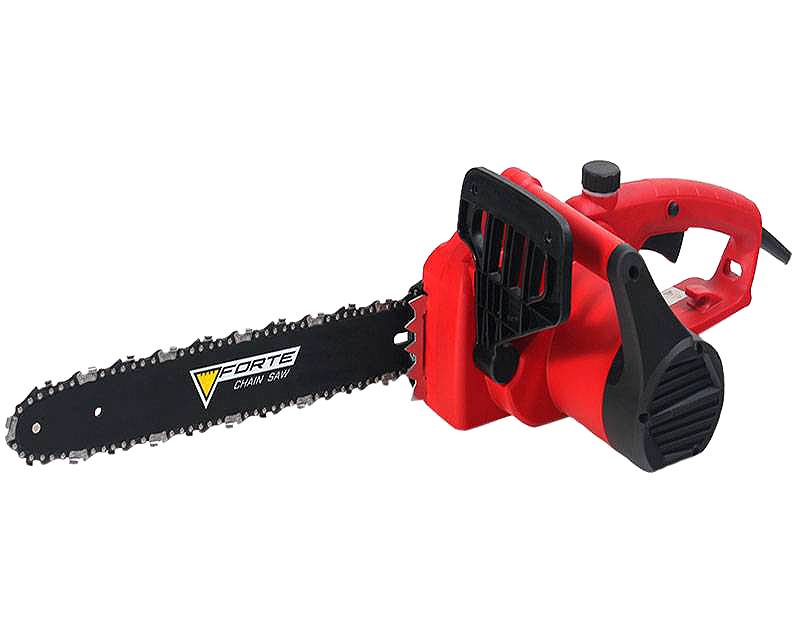
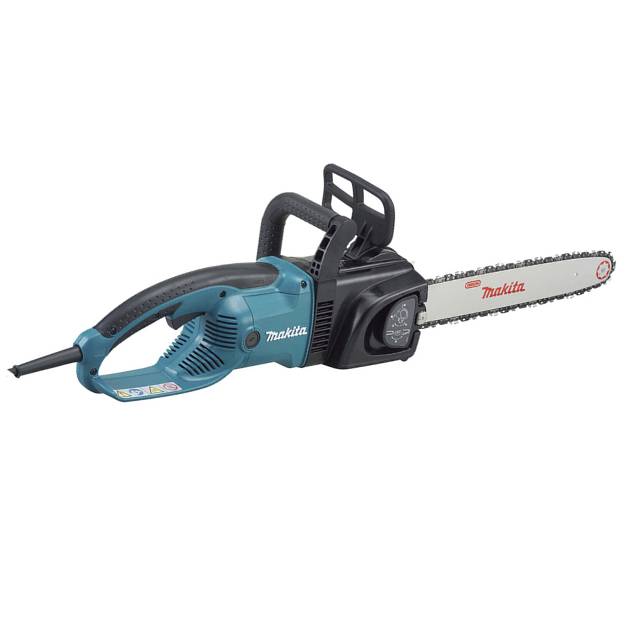
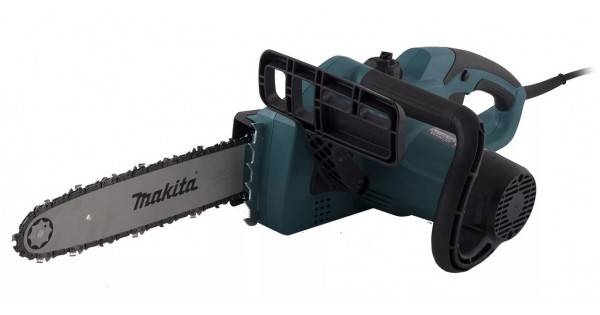
Разобравшись с основными техническими моментами и критериями выбора, перейдем непосредственно к знакомству с электрическими цепными пилами.
Inclined Planes

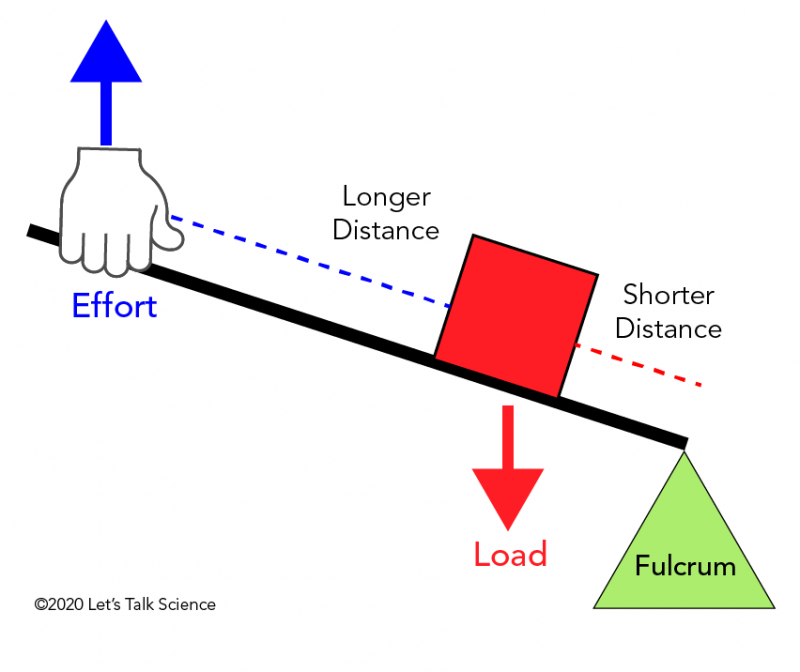
An inclined plane is exactly what its name says. It’s a plane that is inclined, or in other words, slanted. This simple machine connects a lower level to a higher level, making it easy to move objects. The slanting surface supports some weight of an object as it moving upwards, making it utilize less force. However, the object must move at a longer distance than it would on a straight surface. An object will use less force to move upward in an inclined plane with a more gradual slope.
One of the most common applications of inclined planes is getting heavy objects into a truck using a ramp. Less force is required to get the object inside of the vehicle, the tradeoff being covering a longer distance.
Other types of inclined planes include:
- Wheelchair ramp
- Slide
- Slanted roof
Wheels and axles
The invention of the wheel and axle (the rod around which a wheel turns), around 5500 years ago in the Middle East, revolutionized transportation and gradually brought huge changes to society, but what made it so special?
It’s easier to push a cart loaded with a heavy box than to push the same box along the ground because the cart’s wheels and axles reduce friction and provide leverage. You can find out how in our main article
on how wheels work.
Big wheels are used to multiply force in other ways too.
Pipes, for example, have wheels called stopcocks (or stop valves) fitted to them. When you
turn the outer rim of a stopcock, the inner axle turns with much
greater force—so the pipe is easier to close. Steering wheels work this
way too. A truck or a bus often has a bigger steering wheel than a car,
because it takes more force to turn its wheels. The bigger wheel gives
the driver more leverage.
Wheels can multiply distance and speed as well as force. Bicycles have large wheels so they
go faster. When you pedal, you power the inside of the wheel. But the
wheel’s outer rim turns around faster and covers more ground, so your
pedaling has a much greater effect. Car wheels work the same way.
Artwork: A wheel can work as either a force multiplier or a speed multiplier (but not both at the same time).
If you turn the outside (rim) of a wheel, the axle at the center turns with less speed but more force, so the wheel works as a
force multiplier. If you turn the axle instead (as a car does), the wheel becomes a speed multiplier.
The axle turns only a short distance (blue arrow), but the leverage of the wheel means
the outer rim turns much further (red arrow) in the same time. That’s how a wheel helps you go faster.
Wheelbarrows combine wheels and levers to brilliant effect. A
wheelbarrow makes it really easy to transport a load from one place to
another—for two reasons. First, its long frame acts like a lever, so
the load is much easier to lift. Second, it’s easier to push the load using
a wheelbarrow because the only friction is between the wheel and the axle.
If you pushed the load across the rough surface of the ground without using a
wheelbarrow, the friction would be much greater.
What Simple Machines Are in A Bike?
Many of the machines we have nowadays are a combination of various simple machines, the bike included. It usually has the following simple machines.
- Wheel and axle: the pedals, cassette, wheels, and crankset
- Pulleys: braking mechanism, drive train, shifting mechanism, and chains on the gears
- Levers: handlebars, brakes, and gear shifters
- Inclined planes: tire repair kit, chainrings teeth, screws that hold it together
Since a bicycle is a compound of simple machines, it also makes work easier. How does it accomplish this? If you choose to walk, you’re going to need a lot of time and energy. Using a bicycle can help you reach your destination faster and using less energy.
Fun Science for Kids
Looking for lots more fun, science experiments for kids? You’ve GOT to try some of these outrageously fun science experiments for kids! We have so many fun, creative and easy science experiments for elementary age children:
- 100 Amazing Food science experiments for kids – arranged by type of science
- Colorful Capillary action science experiment (also known as walking water)
- Lots of really cool dry ice experiments to try at home
- Amaze kids with these 12 Hands on Science experiments with batteries
- 24 Epic Solar system science projects to try this week
- Fun Water balloon science experiment that explores density
- 50 Fun Preschool science experiments the whole family will want to try
- Amazing, heat-sensitive color changing slime
- Simple Galaxy science project
- Easy and Fun Dancing Raisins Experiment
- Learn about weather as you find how to make a weather vane
- Eye opening Eye science experiments
- Easy-to- make Air pressure science project
- Amazing POP rocks science experiment is one of our all-time favorite science experiments we like to do during the summer are
- Stunning Chromatography Flowers are so pretty you’ll forget it was as science project!
- How to Make a Lava Lamp – super easy and SO cool!
- 30 Simple machines science projects kids will want to try
- Easy, fascinating, and colorful project answering Why do Leaves Change Color Experiment
- Free Printable Animal Classifications for Kids Cootie Catchers
- 19 Edible science experiments – which delicious project will you try first?
- HUGE Free Solar System Unit (coloring pages, hands on science projects, worksheets, and more!)
- Pipe Cleaner Constellation Activity (As seen on Good Housekeeping!)
- Teach kids about conductivity with this fun squishy circuits projects
- Amazing, Heat Sensitive, Color Changing Slime
- Life Cycles for Kids (from penguin to sunflower and spider to turkey we have LOTS of life cycles to explore and learn about)
- EASY, Colorful Oil and Water Science Experiment
- Kids will be amazed as you change colors of white flowers with this Dying Flowers Science Experiment
- This super cool Lego Zipline is fun and simple to make
- Human Body Project
- Check out this super cool look INSIDE a Volcano Project
- Exploding Watermelon – science experiment that explores potential and kinetic energy with a big WOW moment!
- Memorable Life Size Skeletal system science project – includes free printable template
- Find LOTS more Easy Science Experiments for kids of all ages!
- Money Math Games – lots of fun, clever, and FREE money games and activities for kids.
Looking for more fun, creative ways you can begin your free homeschool? We have over 1,000,000 pages of FREE Printable Worksheets including resources for: pre k worksheets, kindergarten worksheets, 1st grade worksheets, 2nd grade worksheets, 3rd grade worksheets, 4th grade worksheets, 5th grade worksheets, 6th grade worksheets, and more. Plus see our history lessons for kids, hands-on countries for kids, printable math games, language arts worksheets, sight word worksheets, free alphabet printables, and cvc word activities for kids of all ages!
Screws
Photo: The spiral thread on a screw means it takes longer to drive
it into wood but—theoretically at least—you need less effort. The grooves also
help the screw to remain in place.
A screw bites into wood when you turn it around. You often read
science books that say a screw is “like
a ramp wrapped around in a circle”, which is pretty confusing and hard
to understand. But imagine you’re an ant and you want
to climb from the bottom of a screw to the top. If you climb vertically
up the outside, you go a relatively short distance but it takes an
awful lot
of climbing force. If you walk up the screw thread, winding around
and around, you’re really walking up a kind of spiral staircase—a ramp
wrapped around in a circle. Yes, you walk much further, but it’s a whole
lot easier. There’s another good thing about a screw too: because
the head is bigger than the shaft beneath it, a screw works
like a wheel (or lever): each time you turn the head, the sharpened
point beneath bites into the wood with greater force. The tapering
(cone-shaped) design makes it easier to drive in the screw.
Examples of Lever Simple Machine
1. Nut Cracker
A nutcracker is a prominent example of a second-class lever simple machine. Here, the fulcrum is located at one end of the machine, and the load or the nut, in this case, is placed in the middle. The force required to break the nut is applied to the end that is present opposite to the fulcrum.
2. Seesaw
Seesaws demonstrate the working of a first-class lever simple machine in the simplest possible way. Here, the fulcrum is located in the middle of an iron rod. The child sitting on one end of the beam acts as a load, while the child sitting on the opposite end applies the necessary force to move the load.
3. Scissors
The pivot along which the complete structure of a pair of scissors moves is located in the middle. The load, i.e., the paper or cloth is placed between the blades of the scissors at one end, whereas the user exerts mechanical force to the opposite end. The applied force gets transferred to the load through the fulcrum or the pivot, thereby causing the deformation of the load. Hence, a pair of scissors act as a first-class lever simple machine.
4. Plier
In terms of working, a plier is very much similar to that of a pair of scissors. It is yet another example of a first-class lever machine where the force is applied at one end, the load is placed at the opposite end, and the balance point is present in the middle.
5. Stapler
The balance point or the fulcrum of a stapler is present at one edge, whereas the force is applied to the opposite end. The load or the sheets of paper are placed in the middle. Hence, a stapler is a classic example of second-class lever simple machines.
6. Wheelbarrow
A wheelbarrow consists of a metallic container that is attached with handles at one end and a wheel at the other end. Here, the wheel acts as a fulcrum or the balance point, the load is placed in the middle, and the push force is applied to the handles. Therefore, the arrangement forms a second-class lever simple machine.
7. Human body
Various joints in the human body function on the basic principle of a lever simple machine. These body parts include the elbow joint, Achilles tendon, the joint between hummers and radius-ulna, the joint between the skull and the atlas vertebrae, etc.
8. Broom
When a broom is used for sweeping dirt, it acts as a third-class lever simple machine. This is because the load is present at the one end of the broom, i.e., on the brush side, the effort or the force is applied in the middle, and the pivot is located at the top.

9. Hammer
Hammer is yet another example of a third-class lever machine. The force is applied at the centre, the load or the reaction of the force is observed at the end, and the pivot is formed on the opposite end.
10. Balance Scale
A balance scale makes use of a pivot in the middle of a beam. On either side of the scale, containers are attached that are used to contain the standard and the unknown weights. This means that the fulcrum is present in the middle, whereas the load and effort are present on either side of the beam. Hence, a balance scale is one of the best examples of a first-class lever simple machine.
Third Class Levers
In a third class lever, the effort is located between the load and the fulcrum.
In a third class lever, the effort is located between the load and the fulcrum. If the fulcrum is closer to the load, then less effort is needed to move the load (2020 Let’s Talk Science).
If the fulcrum is closer to the load, then less effort is needed to move the load. If the fulcrum is closer to the effort, then the load will move a greater distance. A pair of tweezers, swinging a baseball bat or using your arm to lift something are examples of third class levers. These levers are useful for making precise movements.
Third class levers are used when swinging a tennis racquet (left), in staple-removers (centre) and when you lift objects using the muscles in your biceps (right) (Sources: Australian Paralympic Committee via Wikimedia Commons, Frank C. Müller via Wikimedia Commons and John Seb Barber via Wikimedia Commons).
Levers are very useful simple machines used for transferring force. You may not realize it, but you use levers every day!
Simple Machine Projects
Ready to make a simple machine project? We have so many fun simple machines projects ideas using simple items from around your house or classroom.
- Archimedes Screw Exploration from High Hill Education is a simple project using a plastic bottle that showcases how this invention made hundreds of years ago was able to move material.
- Kids will get a kick out of moving toys from downstairs to upstairs using this Banister Pulley from Hands on As We Grow
- Kids are sure to be impressed by this working elevator model that explores pulleys from How to Adult
- Let your kids imaginations run wild as they make their own Button Wheel & Axel Cars from Almost Unschoolers
- This Corn Pulley from Play at Home Mom LLC is just what your preschooler needs in their sandbox to make simple machines come alive
- Pulley Experiment for Kids from 123 Homeschool 4 Me uses common household items like cans to make a fun-to-try simple machine
- No time to make your own simple machine, no worries! Do what Exploring Forces & Motion from A Day in First Grade did
- Simple machines and art collide in this fun Inclined Planes Art from Strong Start
- Explore the usefulness of Inclined Planes in this “Egg”speriment from 123 Homeschool 4 Me
What is a Lever?
A lever is a simple machine made of a rigid beam and a fulcrum. The effort (input force) and load (output force) are applied to either end of the beam. The fulcrum is the point on which the beam pivots. When an effort is applied to one end of the lever, a load is applied at the other end of the lever. This will move a mass upward. Levers rely on torque for their operation. Torque is the amount of force required to cause an object to rotate around its axis (or pivot point).
What is mechanical advantage?
A lever provides mechanical advantage. Mechanical advantage refers to how much a simple machine multiplies an applied force. The location of the effort, load, and fulcrum will determine the type of lever and the amount of mechanical advantage the machine has. The farther the effort is away from the fulcrum, the easier it is to move the load.
Mechanical advantage can be calculated using this formula:

Mechanical advantage is equal to the ratio of the effort to the load as well as to the distance from the effort to the fulcrum to the distance from the load to the fulcrum (2020 Let’s Talk Science).
If the distance from the effort to the fulcrum is greater than the distance from the load to the fulcrum, then the lever has a mechanical advantage. In other words, the ratio of these two distances is greater than one. This means that a long distance from the effort to the fulcrum and a short distance from the load to the fulcrum will allow a small effort to move a large load!
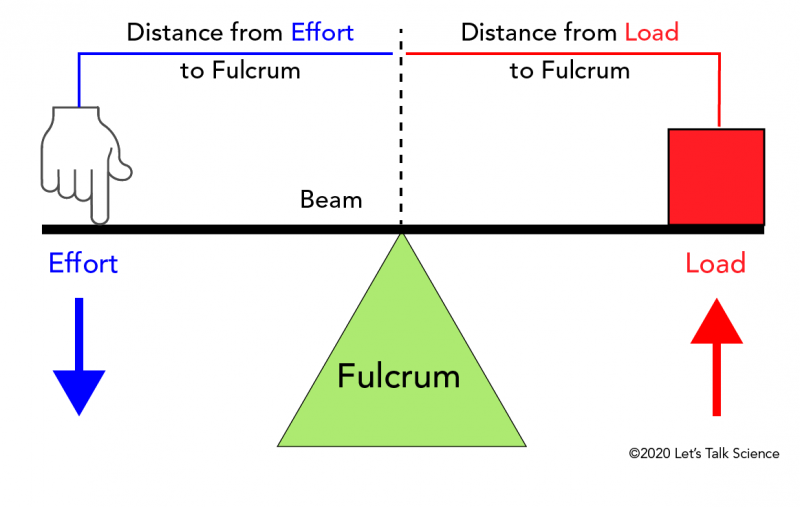
Basic parts of a lever showing the locations of the beam, fulcrum, effort and load ( 2019 Let’s Talk Science).
Pulley
If we want to lift that same 100-lb. weight with a rope, we could attach a pulley to a beam above the weight. This would let us pull down instead of up on the rope, but it still requires 100 lbs. of force. However, if we were to use two pulleys — one attached to the overhead beam, and the other attached to the weight — and we were to attach one end of the rope to the beam, run it through the pulley on the weight and then through the pulley on the beam, we would only have to pull on the rope with 50 lbs. of force to lift the weight, although we would have to pull the rope 4 feet to lift the weight 2 feet. Again, we have traded increased distance for decreased force.
If we want to use even less force over an even greater distance, we can use a block and tackle. According to course materials from the University of South Carolina, “A block and tackle is a combination of pulleys which reduces the amount of force required to lift something. The trade-off is that a longer length of rope is required for a block and tackle to move something the same distance.”
As simple as pulleys are, they are still finding use in the most advanced new machines. For example, , a 3D printer that can build furniture-sized objects, employs a system of wires and computer-controlled pulleys anchored to the walls, floor, and ceiling.
Gears
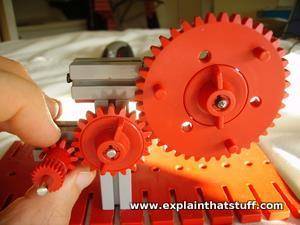
Photo: A gear is made from two or more wheels of different sizes with teeth cut into their edges to ensure they “mesh” (turn together without slipping).
Gears are wheels with teeth that can either increase the speed of a machine or its force,
but not both at the same time. Bicycles use gears in both ways. If you want to pedal up a hill,
you use gears to increase your force so you don’t have to work quite so hard, although the
catch is that they reduce your speed at the same time. If you’re racing along a straight road, you can use gears to increase your speed, but this time the catch is that they’ll reduce your force. Although it’s not obvious just by looking
at them, gears work in exactly the same way as levers (just as wheels do).
That takes quite a bit of explaining so we won’t go into more details here.
Instead, you can read all about it in our gears article.
Find out more
Simple machines
- Making Machines with Levers by Chris Oxlade. Raintree, 2016. This is one of a series of six activity-driven books covering levers, wheels and axles, pulleys, ramps, screws, and springs. Ages 7–9.
- Simple Machines: Forces in Action by Buffy Silverman. Heinemann Library, 2016. A typical 48-page curriculum-based guide.
- The Kids’ Book of Simple Machines: Cool Projects and Activities That Make Science Fun by Kelly Doudna. Mighty Media, 2015. An activity-driven guide covering each of the simple machines in turn.
- How Machines Work: The Interactive Guide to Simple Machines and Mechanisms by Nick Arnold and Allan Sanders. Templar, 2011. A short book and hands-on experiment kit that introduces 12 simple machines for ages 7–9.
- The Science of Forces: Projects and Experiments with Forces and Machines by Steve Parker. Heinemann, 2005. A 32-page hands-on introduction to things like gears and ramps.
Pulley
If we want to lift that same 100-lb. weight with a rope, we could attach a pulley to a beam above the weight. This would let us pull down instead of up on the rope, but it still requires 100 lbs. of force. However, if we were to use two pulleys — one attached to the overhead beam, and the other attached to the weight — and we were to attach one end of the rope to the beam, run it through the pulley on the weight and then through the pulley on the beam, we would only have to pull on the rope with 50 lbs. of force to lift the weight, although we would have to pull the rope 4 feet to lift the weight 2 feet. Again, we have traded increased distance for decreased force.
If we want to use even less force over an even greater distance, we can use a block and tackle. According to course materials from the University of South Carolina, “A block and tackle is a combination of pulleys which reduces the amount of force required to lift something. The trade-off is that a longer length of rope is required for a block and tackle to move something the same distance.”
As simple as pulleys are, they are still finding use in the most advanced new machines. For example, , a 3D printer that can build furniture-sized objects, employs a system of wires and computer-controlled pulleys anchored to the walls, floor, and ceiling.


Second Class Levers
In a second class lever, the load is located between the effort and the fulcrum.
In a second class lever, the load is located between the effort and the fulcrum. When the fulcrum is closer to the load, then less effort is needed to move the load (2020 Let’s Talk Science).
If the load is closer to the fulcrum than the effort, then less effort will be required to move the load. If the load is closer to the effort than the fulcrum, then more effort will be required to move the load. A wheelbarrow, a bottle opener, and an oar are examples of second class levers.
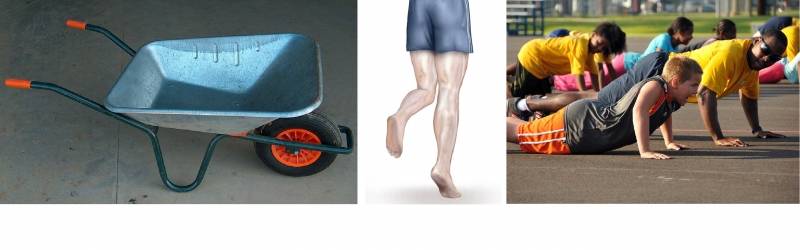
Second class levers are used in wheelbarrows (left), when going on tiptoes (centre) and when doing push-ups (Sources: MarkusHagenlocher via Wikimedia Commons, BruceBlaus via Wikimedia Commons and U.S. Navy via Wikimedia Commons).
Is there a catch?
Lifting, cutting, chopping, moving, bending—machines like the ones we’ve explored up above make it easier to do all kinds of things
by making forces bigger than you can normally create with your own body. At first sight,
that sounds like it might open up the way to designing a machine that can give us something for nothing—maybe one
that can make energy out of thin air, or a perpetual motion machine that runs forever.
In practice, the laws of physics are strict and if you make life easier for yourself in one way,
you always make it harder in another to compensate. That’s the scientist’s way of saying “there’s no such thing as a
free lunch,” and, in physics, it goes by the name of the law of conservation of energy
(simply put: we can’t make energy appear magically out of nowhere).
So whenever you have a machine that gives you more force, it doesn’t give you extra energy you didn’t have before.
With a pulley, for example, ropes and wheels give you much more lifting force, but you have to heave them much further,
so you use exactly the same amount of energy as you would have done before. You just use it more slowly, with less effort,
so the lifting feels easier. In the same way, you can use a see-saw to lift a much heavier friend by sitting further
from the balancing point than they are, but you have to move your legs much further to compensate. You get extra force, but
no extra energy—and that’s the catch.
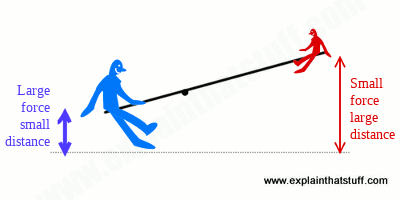
Artwork: A seesaw lets you create extra lifting force. The little red person
can lift the big blue person by sitting further from the pivot point. That means they can lift a bigger force, but
the catch is that they have to move their own body over a much bigger distance.
This machine makes more force, but no more energy.
Force multipliers
In addition to reducing friction, a wheel and axle can also serve as a force multiplier, . If a wheel is attached to an axle, and a force is used to turn the wheel, the rotational force, or torque, on the axle is much greater than the force applied to the rim of the wheel. Alternatively, a long handle can be attached to the axle to achieve a similar effect.
The other five machines all help humans increase and/or redirect the force applied to an object. In their book “Moving Big Things” (It’s about time, 2009), Janet L. Kolodner and her co-authors write, “Machines provide mechanical advantage to assist in moving objects. Mechanical advantage is the trade-off between force and distance.” In the following discussion of the simple machines that increase the force applied to their input, we will neglect the force of friction, because in most of these cases, the frictional force is very small compared to the input and output forces involved.
When a force is applied over a distance, it produces work. Mathematically, this is expressed as W = F × D. For example, to lift an object, we must do work to overcome the force due to gravity and move the object upward. To lift an object that is twice as heavy, it takes twice as much work to lift it the same distance. It also takes twice as much work to lift the same object twice as far. As indicated by the math, the main benefit of machines is that they allow us to do the same amount of work by applying a smaller amount of force over a greater distance.
A seesaw is an example of a lever. It’s a long beam balanced on a pivot. (Image credit: BestPhotoStudio Shutterstock)
Making Simple Machines with Household Items
These simple machine experiments are truly the best for exploring and learning while having FUN and creating something amazing!
- This DIY Muscle Machine from KiwiCo is a fascinating project using pulleys.
- I Spy Simple Machines from 123 Homeschool 4 Me is a free printable that not only teaches about simple machines, but gives instructions for a fun simple machines scavenger hunt too!
- Bubble Machine Blower Machine from Teach Beside Me – this is such a fun idea kids will get excited about that explores the wheel simple machine
- Lego Zipline from Little Bins for Little Hands is such a cool project to explore pulleys with kids
- This easy to make pulley and lever board from Inspiration Labratories is the perfect introductory project to do indoors with kids of all ages!
- Levers have never been more fun than when you create one out of recycled materials like The OT Toolbox
- DIY Craft Stick Catapult is a fun-to-try activity learning about levers from Coffee Cups and Crayons
- Make science come alive for kids with this Straw Roller coaster from Frugal Fun 4 Boys that explores inclined planes with kids!
- Dive into history with this Ancient Civilization Irrigation Model that explores several simple machines from Teach Student Savvy