
Upgrade 1 | Clamping system
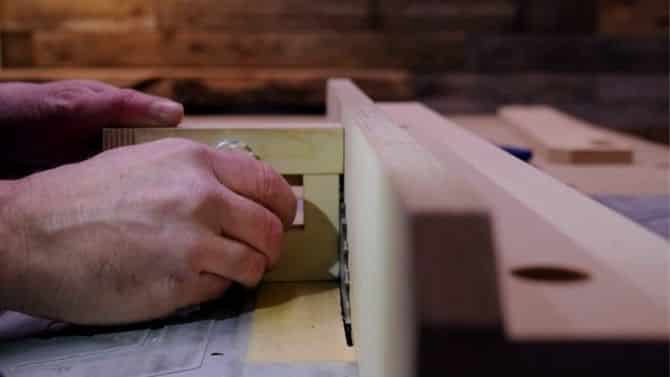
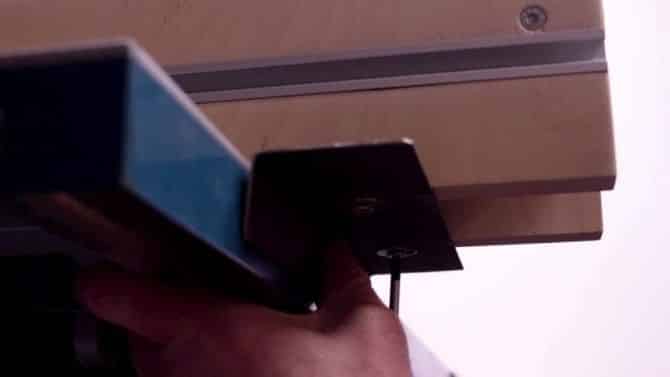
The clamping system I made in the first video could be better.The block I used was too big and always got in the way when I wanted to place the saw against the out-feed table. That is why I replaced the wooden block with an L-shaped piece of metal. The metal I used for this is about 20 cm (7.87”) long. To attach this metal part to the DIY table saw guide, drill two holes at the same width as the sides of the guide. The holes can be much larger than the screws, so you can adjust the clamp.In that way, the new guide fits optimally on the tabletop.
Now attach this metal clamp to the bottom of the DIY table saw fence with screws and washers. Do not tighten yet so that you can later adjust the clamping system.
Place the new guide on the table-top, but do not clamp it yet. Now go to the metal clamp and push it against the tabletop.Now screw it tightly. When you tighten the guide, this metal clamp will press against the tabletop.Like that, the DIY table saw fence can no longer move. Mission accomplished! You have now converted the weak table saw guide into a sturdy and reliable one.
Upgrade 2 | Installing a T-track
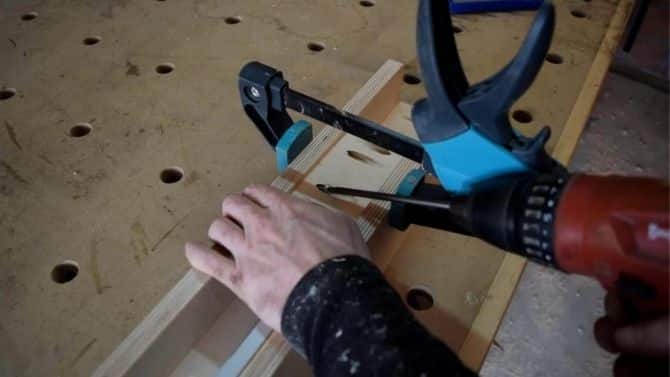
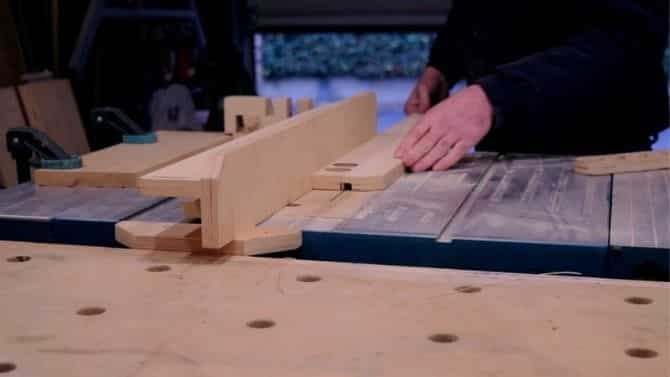
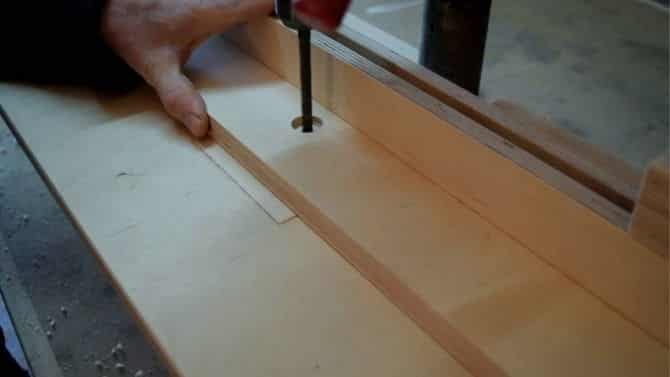
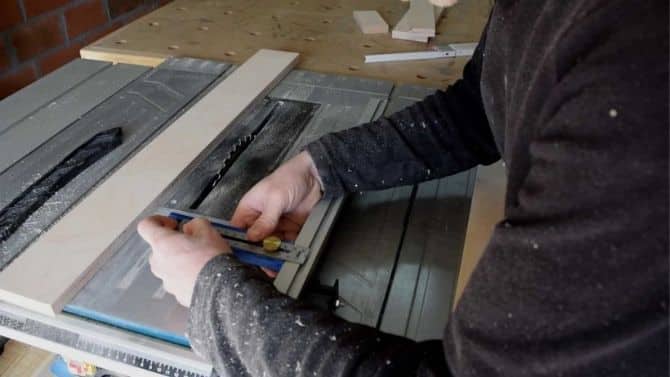
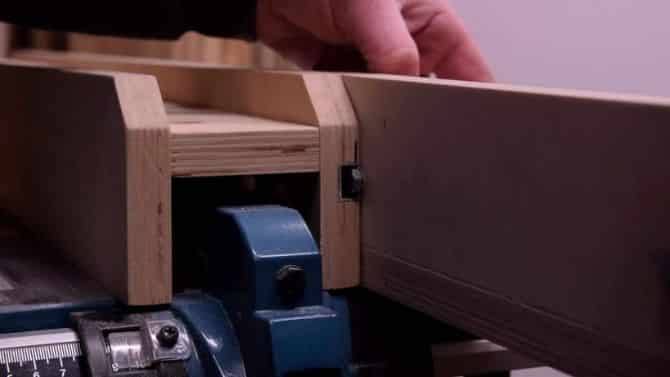
To clamp some jigs and my push stick organizer to the DIY table saw fence upgrade, I attached a T-track rail on the outside. In order to make a slot in your guide, detach this side from the guide, so you could make a slot in it where the T-track fits in. To make this slot easily you can use my homemade Kerfmaker idea. First, you measure the thickness of the saw blade, and then you set the thickness of the slot you want to make.In this case, the width of the T-track.
By setting the Kerfmaker along with the guide, you can make perfect slots.
Afterward, you can update the slot with a chisel and mount the T-track with screws. Once the T-track is installed, you can assemble the new guide onto the original Makita table saw fence.
Overview of the Makita mlt100
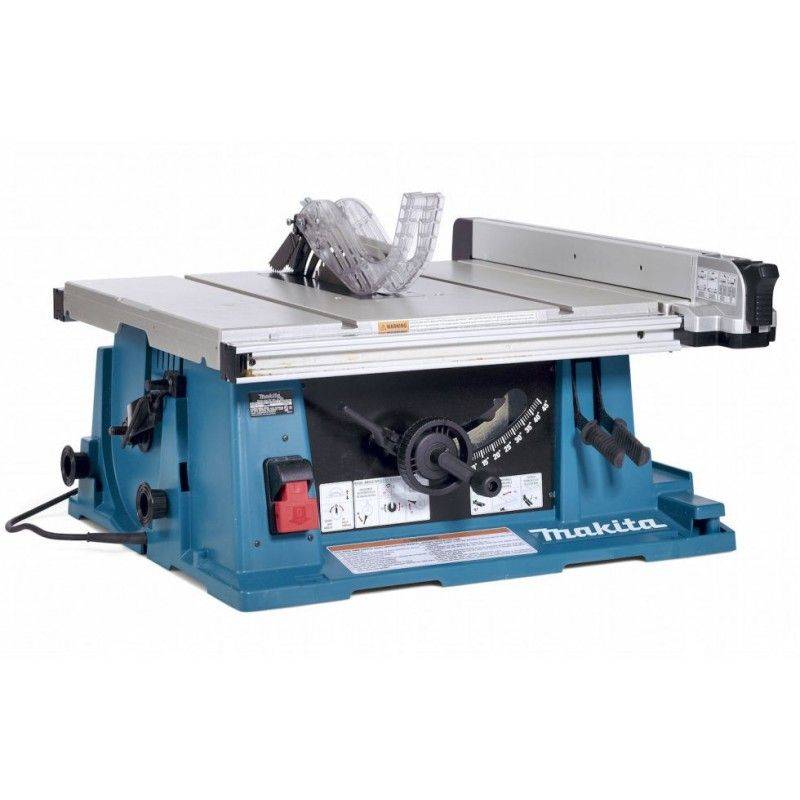
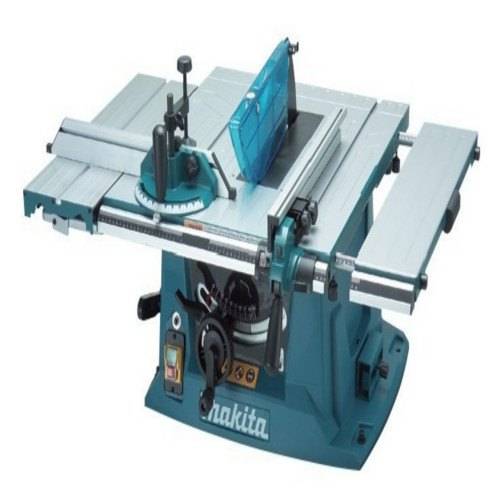
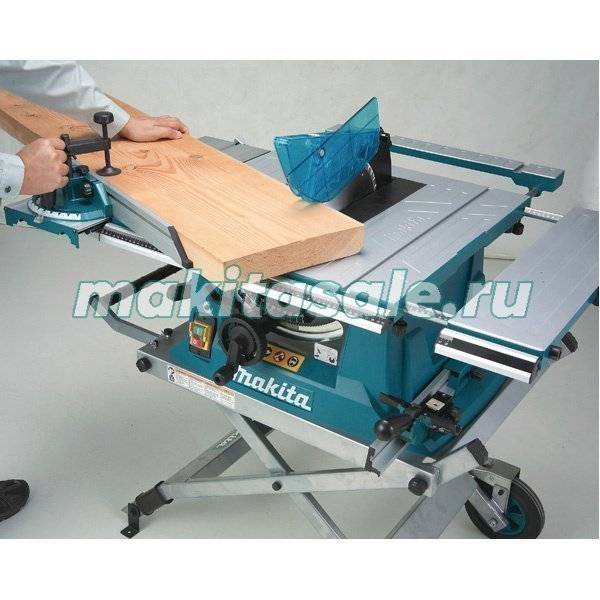
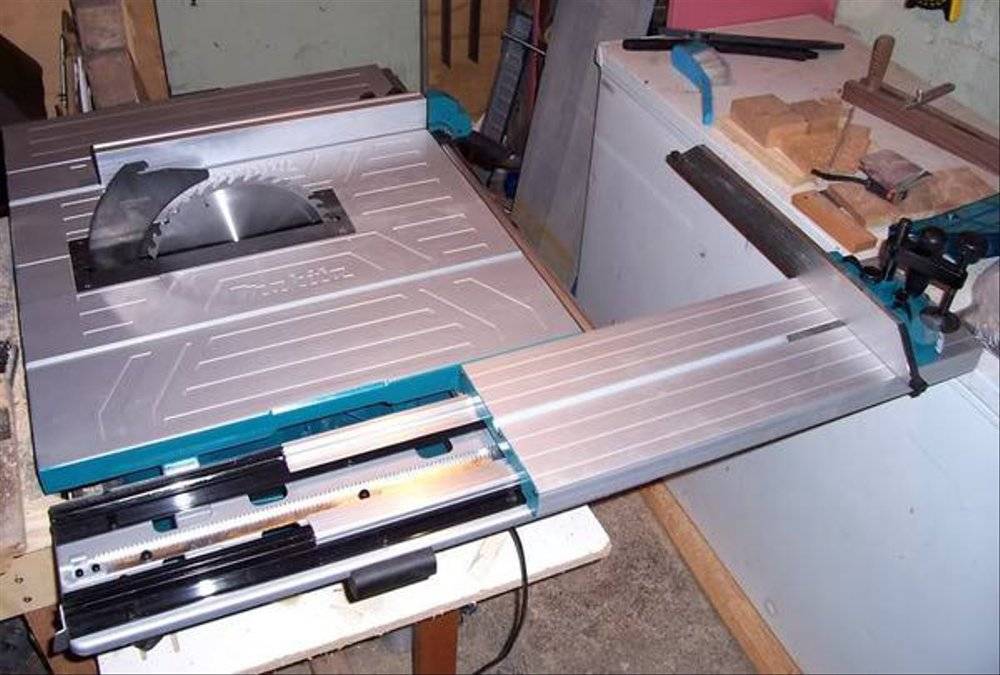
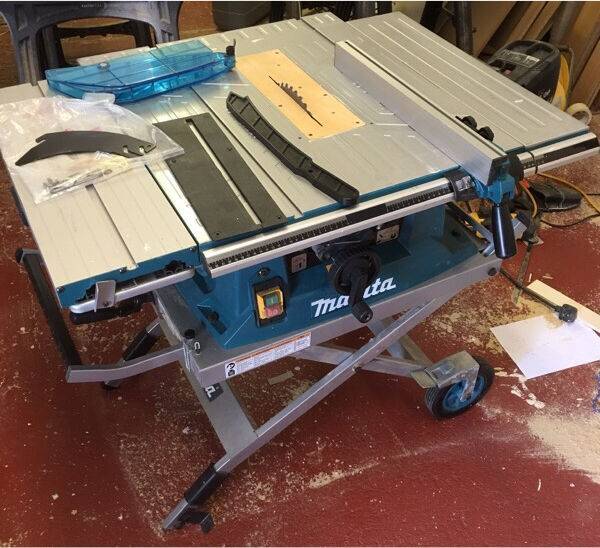
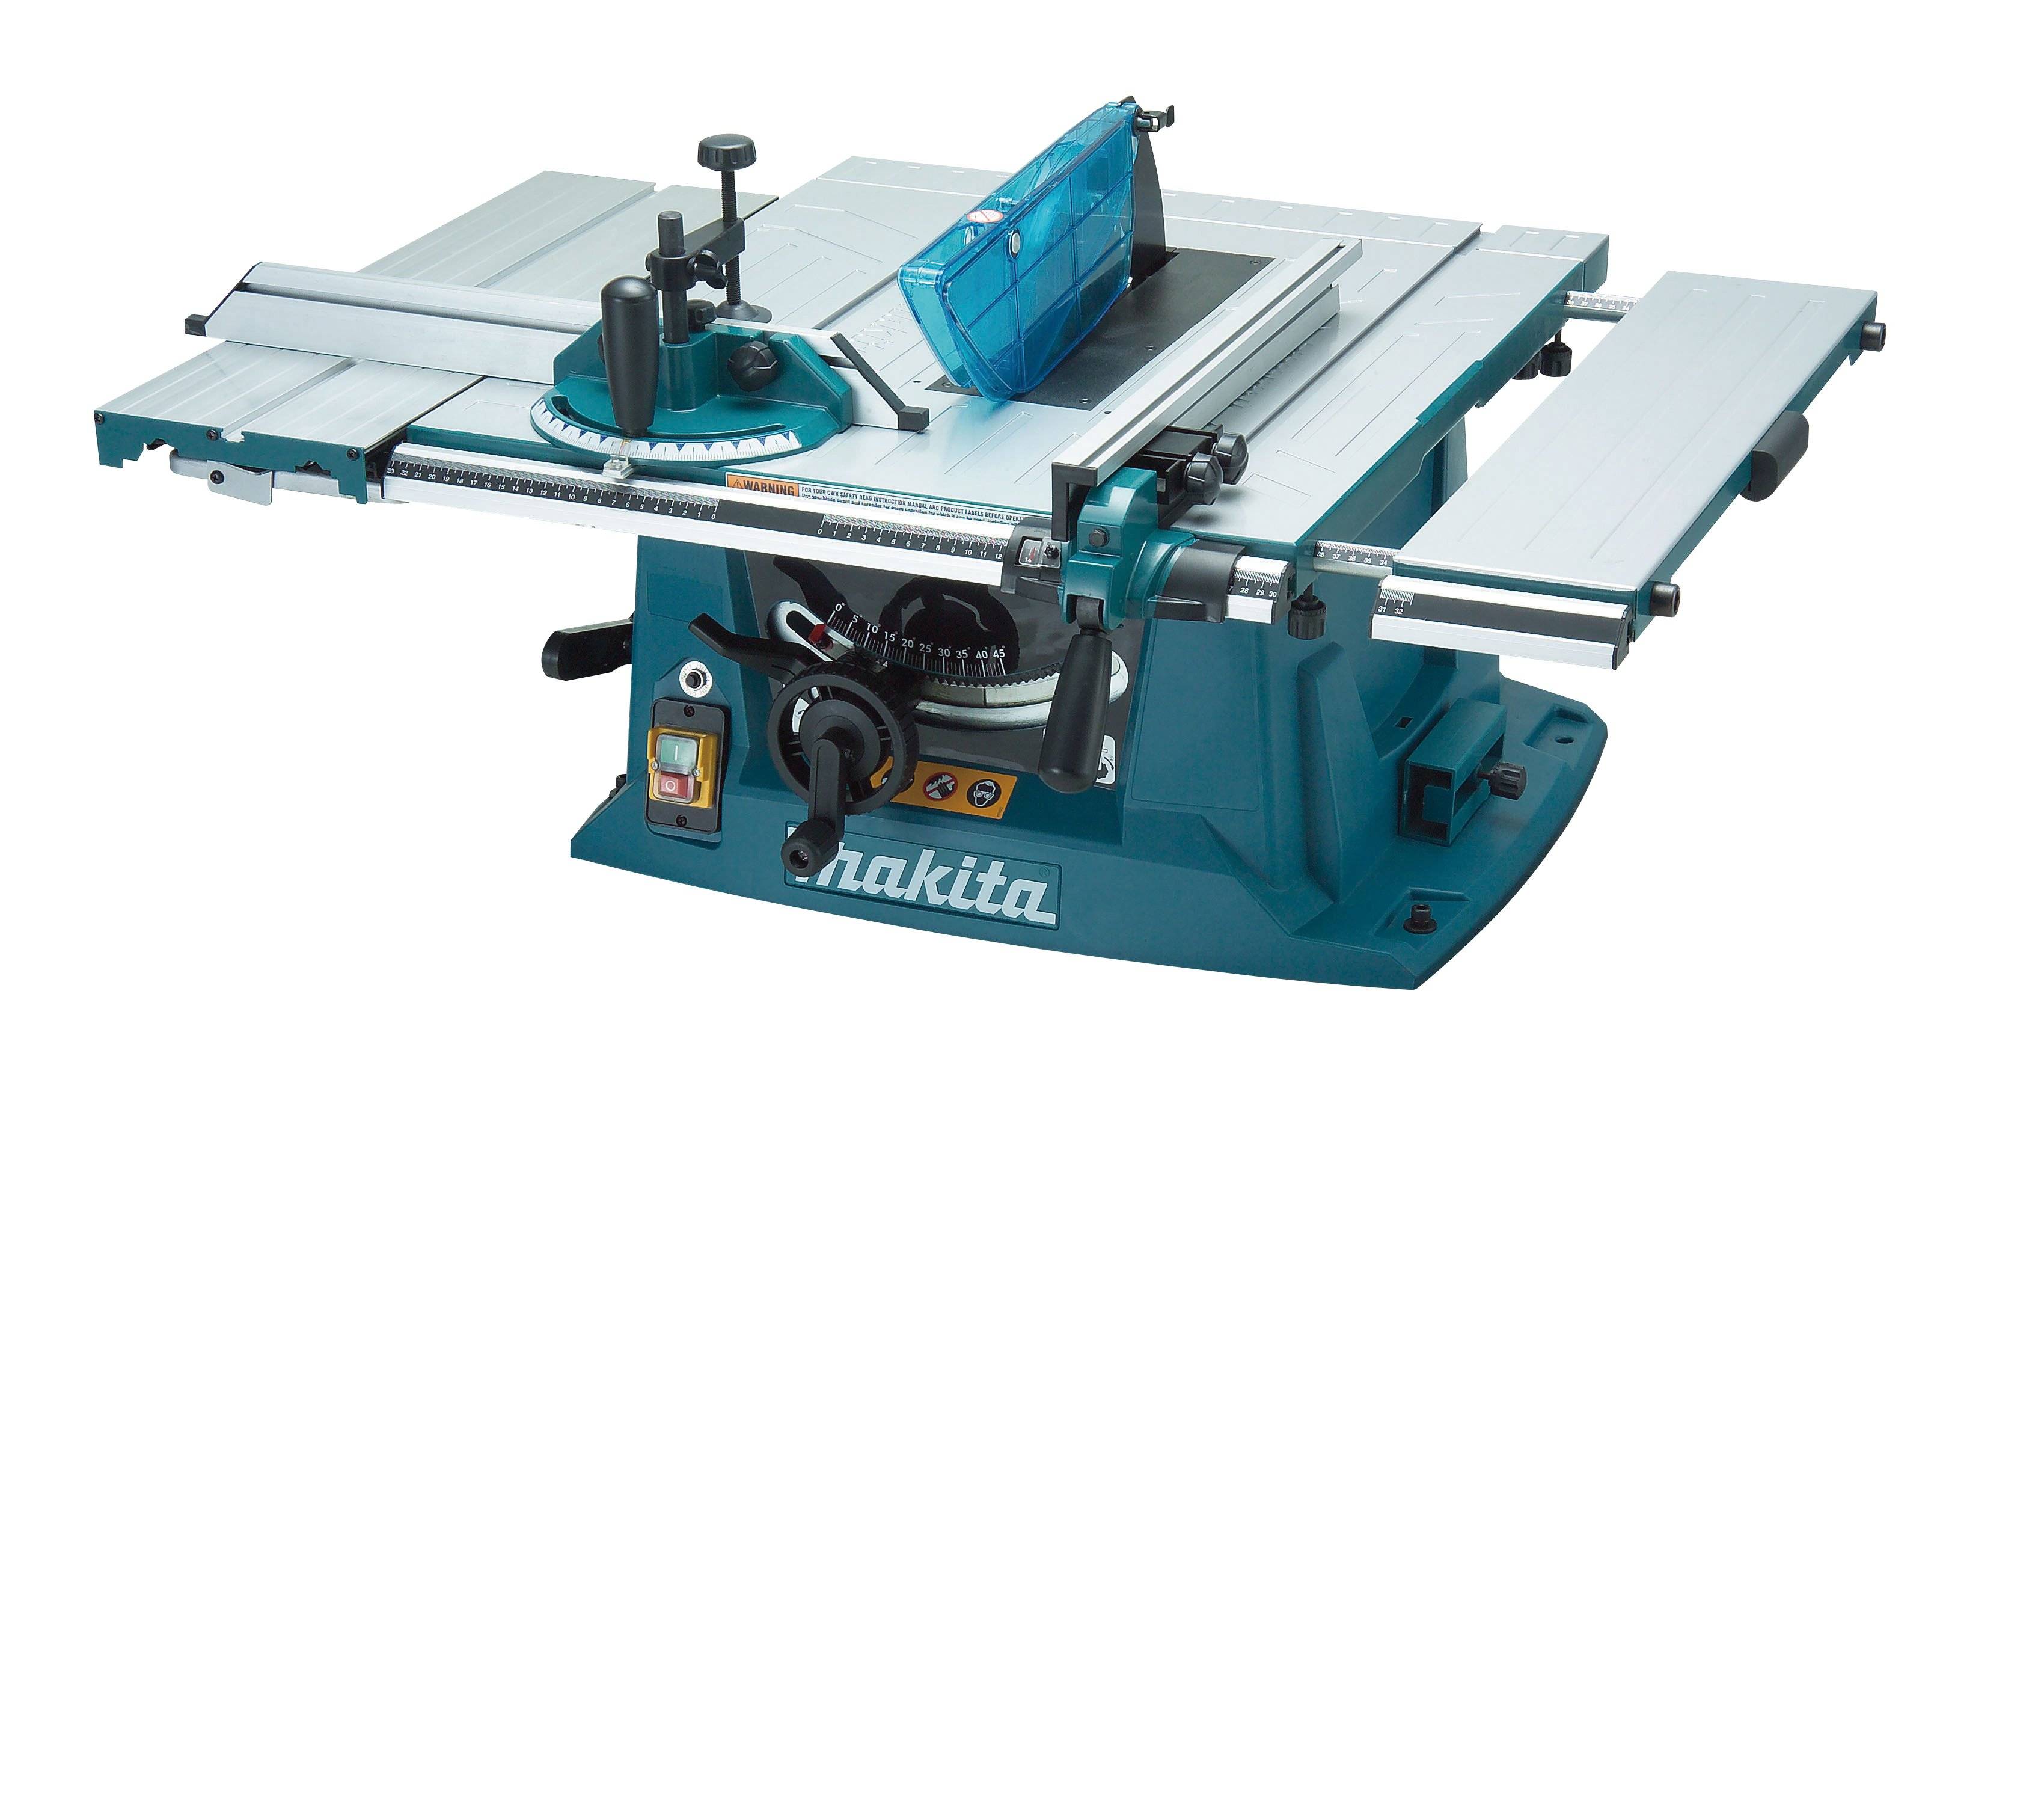
The Makita mlt100 is eye-catching with its blue colour and branding. It replaced the Makita 2704 as it is cost-effective. The 960 x 690mm bed is as large as the main bed. The slide bed of aluminum makes it durable.
The bed extensions increase the width of the saw. That means it can accommodate wide wood pieces. The length loosens the four lock-knobs. The additional storage space for your accessories makes it convenient. These accessories include the miter gauge, push stick, spare blades and the fence. The table saw comes with the blade already installed.
You need to install the blade guard and the riving knife. The blade might be lacking fine-tuning, and you need to tune it to the right point. It does not come with a stand, but you can order it separately. It is less affordable. Safety is ensured by the electric brake. The guard is removable without a tool. The table saw comes with a soft start and dust collection feature.
Pros
- Large bed
- Adjustable length
- Additional storage
- No vibration
- Electric brake
- Powerful motor
- Extendable table
- Safe
- Great design
Видео обзор
Обзор торцевой пилы Makita LS0815FL
Видео
Обзор торцовки Макита MLS 100
Видео
Обзор торцовочной пилы Макита LS1440
Видео
Андрей:
«Консольная торцовочная пила Макита 0815 работает уже третий год. В основном по древесине, иногда металл. Очень удобный лазерный маркер дает возможность пилить легко и точно. Параметры распиловки отличные, пуск плавный. Я доволен пилой, надежная и безотказная».
Семен Семеныч:
«У меня Макита 1019. Радует высокая точность – не более 0,05 см на 25 см люфта нет. Диск нормальный. Нижняя пара направляющих движется медленнее, более плавно, чем верхняя, но это терпимо».
Олег:
«Использую торцовку Макита LS1216 больше 5 лет. В моей модели нет лазера и глубина пропила меньше — 97 мм. Из достоинств отмечу высокую надежность, отсутствие каких бы то ни было люфтов. Недостатки есть, но терпимые: нижние линейки очень деликатные, приходится периодически их править. Электрический тормоз иногда срабатывает с задержкой 7-10 секунд. Подъемно-возвратная пружина засоряется иногда. А в целом отличный профессиональный инструмент, окупается довольно быстро».
На нашем сайте Вы так же можете ознакомиться с описанием и отзывами о цепных пилах (аккумуляторных и бензиновых) таких брендов: Bosch, Олео Мак, Eurolux, Тайга, Интерскол, Hitachi, Eco, Лесник, Poulan, Daewoo, Hammer, Союз, Sturm, Парма, Зубр, Champion, Huter, Echo, Patriot, Урал, Karcher, Carver, Husqvarna, Makita, Дружба, Kruger, Калибр, Stihl, а так же дать обратную связь по бензопилам этих брендов, если вам есть что сказать о качестве сборки и опыте эксплуатации конкретных моделей цепных пил этих брендов, пишите в свой отзыв, он будет очень полезен для наших читателей.
Так же на страницах нашего блога вы можете почитать статьи про:
Обзор бензопилы МС 180
Данная модель оборудования стоит 11 490 руб. Она представляет собой бытовой инструмент, который поможет справиться с работами на дачном участке. С помощью агрегата вы сможете избавляться от ненужных сучков и спиливать небольшие деревья. Управление является однорычажным, а благодаря небольшому весу работать с агрегатом очень комфортно.
Потребителю должно быть известно не только о том, как завести бензопилу «Штиль мс 180», но и о технических характеристиках. Среди прочих следует выделить 35-см шину, а также двигатель, объем которого составляет 31,8 см3. Объем масляного бака равен 0,15 л. Весит оборудование 3,9 кг. Мощность модели равна 2 л. с. Ёмкость топливного бака составляет 0,25 л.
Verdict
Choosing between the Dewalt dw745 and Makita mlt100 is a difficult exercise. However, an exception is a product with more features that make your experience enjoyable and bearable. They both use the 15 Amp motor, have a decent maximum rip capacity of 315mm, easy to use and install, onboard storage for accessories, and the same rack and pinion fence system.
If you have a tight budget, I would recommend the Makita mlt100. It has more speed and an overhead dust collection port. The Dewalt dw745 is more sturdy than the Makita mlt100 and is compact-sized. I am sure you already have the perfect product that serves your interests better.
Guides
DWE7491x vs DWE7491rs Side By Side Comparison
Shop Fox W1837 vs Delta 36 725
Makita MLT100 Циркулярная пила настольная. Назначение, область применения
Настольная циркулярная пила (синономы: пила дисковая, станок циркулярный, станок распиловочный дисковый) модели Makita MLT100 предназначена для индивидуального использования для обработки древесных заготовок, древесностружечных и древесноволокнистых плит: продольного или поперечного, косого, наклонного и комбинированного пиления заготовок.
Циркулярная пила Макита MLT100 является наиболее дорогостоящей моделью среди дисковых станков от японской компании, ее стоимость составляет 42 тысячи. Данный станок применим не только в бытовой сфере, но и на небольшом производстве.
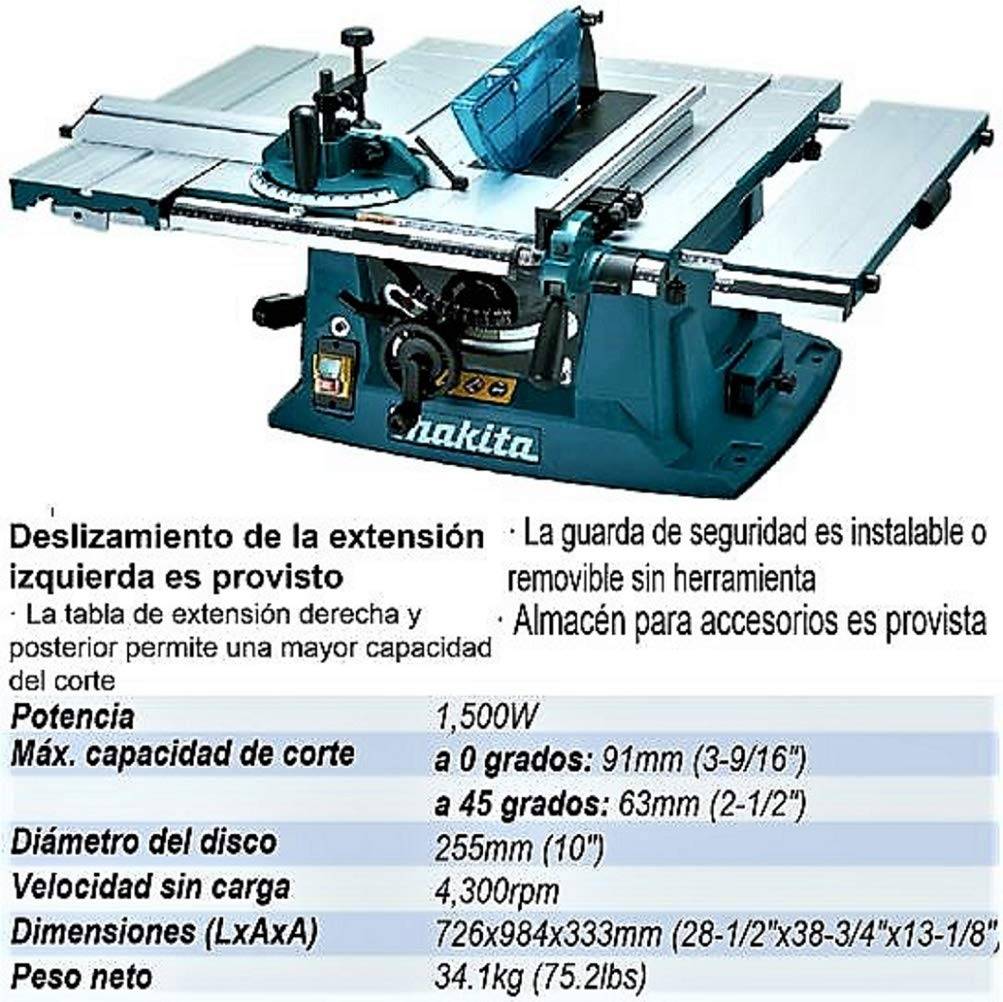
Пила дисковая Makita MLT100 выгодно отличается мощным двигателем 1,5 кВт, с числом оборотов холостого хода 4800 об/мин для выполнения пропилов глубиной до 91 мм.
Не допускается обработка: алюминия и другие цветных металлов, асбоцементных материалов, мягких пластмассовых и резиноподобных материалов. Пила не рассчитана на работу при непрерывном производстве.
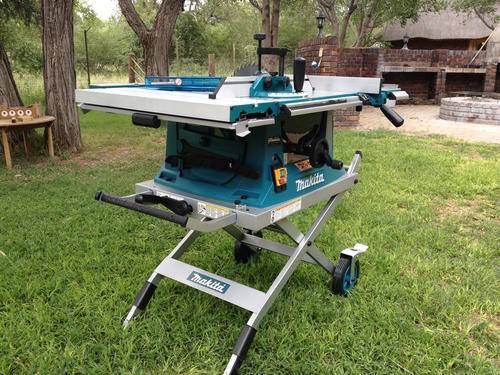
Циркулярная пила Makita MLT100 – начальный вариант для оснащения столярной мастерской, и в то же время способна удовлетворить многих профессионалов, которым не требуется обрабатывать большие объемы древесины или массивные заготовки из нее. Сильные стороны модели – компактность, мобильность, высокая точность при работе с небольшими деталями, перенастраиваемая конструкция.
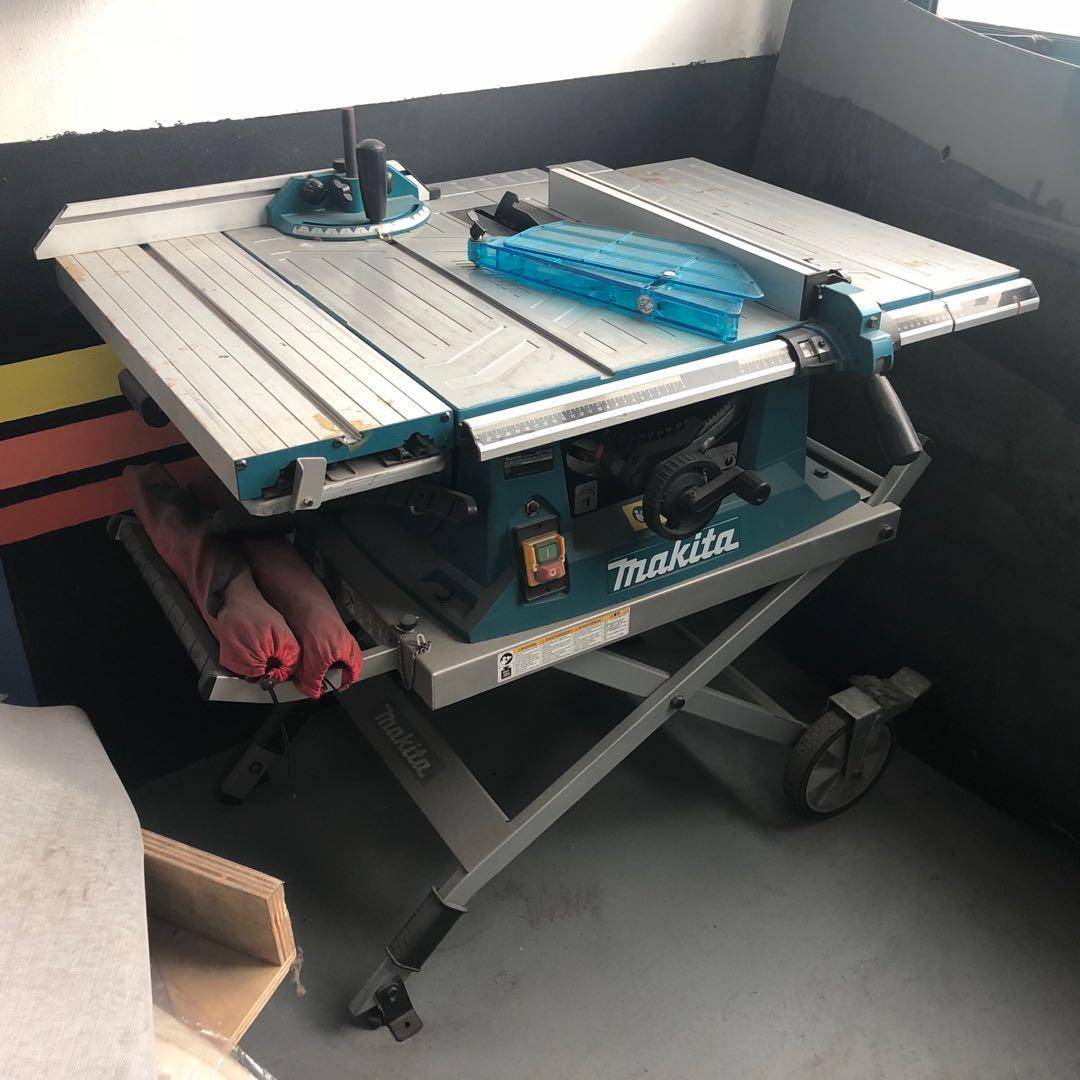
Компактная невысокая пила легко помещается на верстаке, но может устанавливаться и на пол: в комплект входит набор ног и уголков для сборки открытой подставки.
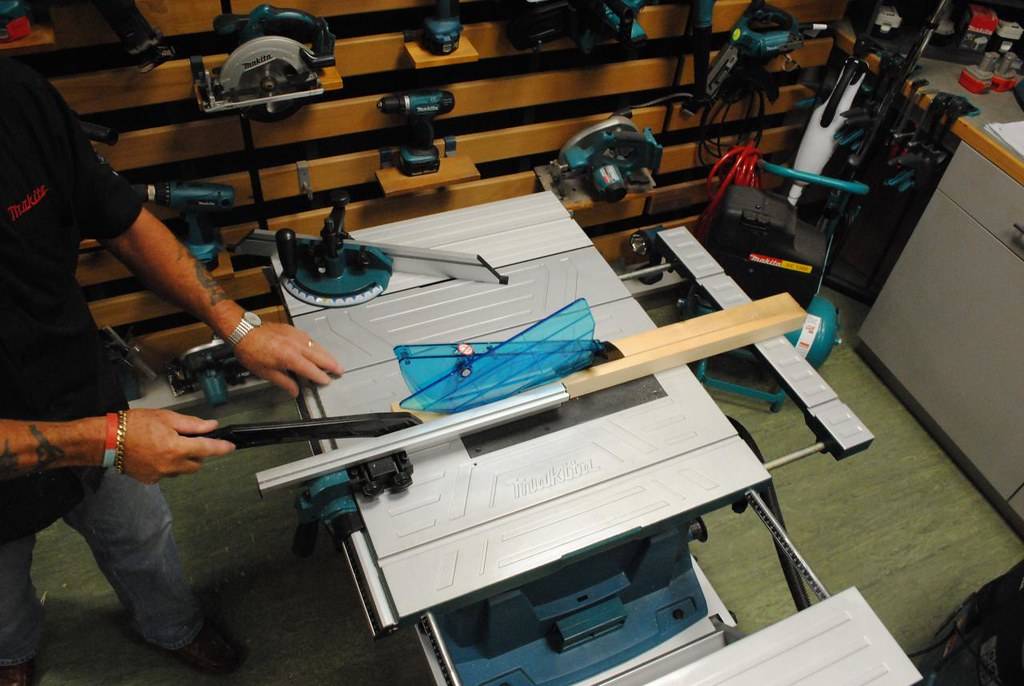
Станок MLT100 выполняет косые, комбинированные, прямые и поперечные распила, а также торцевание. Станок унаследовал от младших моделей систему стабилизации пускового тока, электрический тормоз и 4-ех секционный рабочий стол. Однако конфигурация стола в 2704 несколько изменена — на его правой стороне расположена рукоять для изменения наклона диска, а левая и правая части являются раздвижными, что позволяет обрабатывать крупногабаритные заготовки.
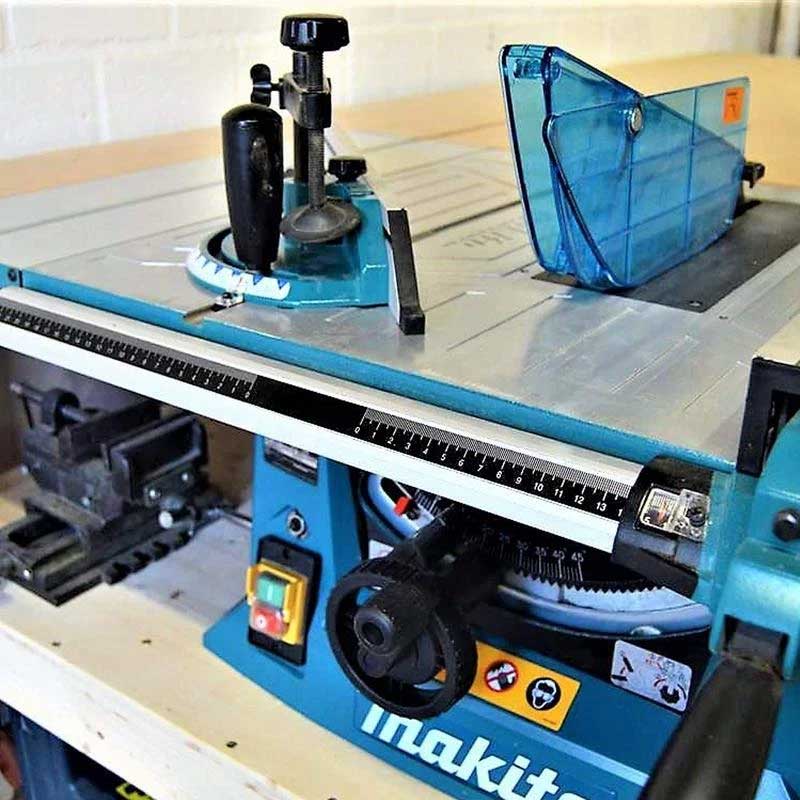
Сам рабочий стол выполнен из литого алюминия, его поверхность отшлифована, что исключает проблемы с перемещением обрабатываемых заготовок. Канавки под установку транспортиру предусмотрены как слева, так и справа распиловочного диска. Транспортир имеет совмещенную с планкой конструкцию: при выполнении косого распила вы перемещаете транспортир, а прикрепленная к нему планка толкает деталь. Так можно аккуратно и безопасно для оператора выполнить точный распил под требуемым углом.
Технические особенности конструкции пилы Makita MLT100:
- Станок выполняет продольные и поперечные резы (торцевание, раскрой) древесины любых пород толщиной до 93 мм
- Плавный пуск двигателя мощностью 1500 Вт позволяет начать работу без рывка
- Имеется система гашения вибраций во время работы и быстрого торможения двигателя после выключения
- Плавная регулировка наклона пильного диска обеспечивает вертикальные углы распиливания от 90° до 45°
- Угловой упор обеспечивают высокоточное пиление (торцевание) под углом от –60° до +60°
- Плавная регулировка пильного диска до 93 мм по высоте
- Имеется саморегулирующийся параллельный упор для точных прямолинейных пропилов
- Разъем для подключения пылесоса — гарантия чистоты рабочей зоны
- Малый вес и габариты удобство транспортировки и хранения
Станок работает от однофазной сети переменного тока напряжением 220 В частотой 50 Гц.
Станок может эксплуатироваться в нормальных климатических условиях:
- температура окружающей среды от 1 до 35°C
- относительная влажность воздуха до 80 % при температуре 25°C
Распиловочные станки аналогичной конструкции, представленные в России
- Makita 2704 – 1,65 кВт
- Makita MLT100 – 1,5
- Bosch PTS 10 – 1,4 кВт
- Bosch GTS 10 j – 1,8 кВт
- Bosch GTS 10 xc – 2,1 кВт
- AEG TS 250 K – 1,8 кВт
- Metabo TS 250 – 2,0 кВт
- DeWalt DW 745 – 1,7 кВт
- DeWalt DW744XP – 2,0 кВт
Технические характеристики

Мы предлагаем вам ознакомиться с основными характеристиками бензопилы “Партнер 350”:
- Инструмент относится к устройствам бытового типа.
- В бензопилу установлен двухтактный двигатель одноцилиндрового типа.
- Удельная мощность системы – 1,3 кВт или 1,8 л.с.
- Объем движка – 36 см3.
- У инструмента ручной старт.
- Максимальный объем топлива – 400 мл.
- Максимальный объем масла – 200 мл.
- Воздушная система охлаждения.
- Максимальное число холостых оборотов равно 4000 об. в минуту.
- Цепной шаг – 3/8.
- Рабочая длина шины – 40 см.
- Бензопила работает на масле и бензине.
- Вес устройства – 4,6 кг.
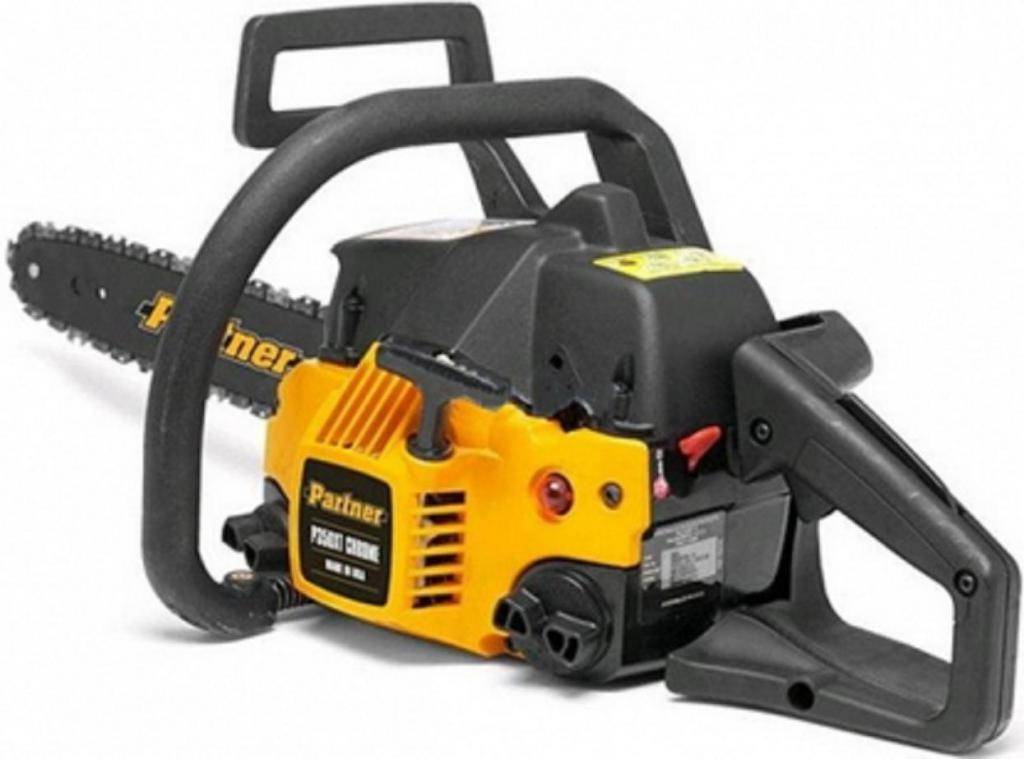
Если вы знакомы с техническими характеристиками различных бензопил, то вы легко можете определить, что “Партнер 350” будет незаменимой вещью в хозяйстве. У данной модели приличная длина шины и достаточно мощный двигатель. К сожалению, “Партнер 350” не годится для профессионального использования (например, для валки леса).

Conclusion
After reviewing these two models of power tool, and taking into account our own experience of working with wood, it is the DeWalt DW745 table saw that is our favourite. This is down to a number of things.
Firstly, the design of the DeWalt is superior to that of the Makita in that the guard and fence systems work better to provide a great rip capacity. The type of warranty the DW745 comes with is also better than the one that comes with the MLT100.
Furthermore, the DeWalt is much lighter and thus easier to pick up and transport. It also makes much more accurate and better quality cuts thanks to its highly powerful motor.
We hope you found this article of use and that it helped you to make a more informed decision as to which table saw to purchase. Now it is time for you to go out and buy one.
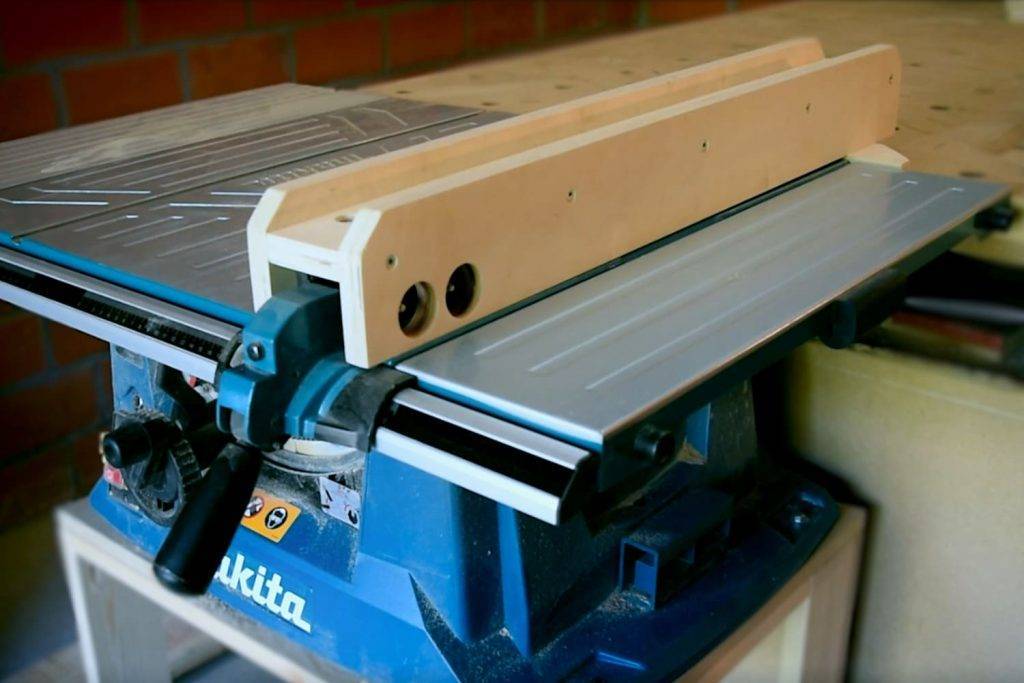
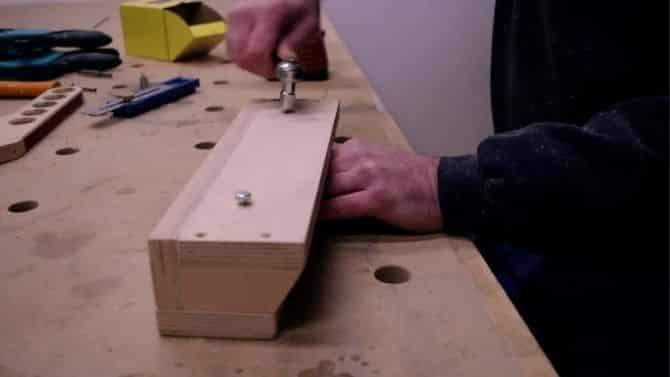
Step 5 | Reinforcement and clamping system
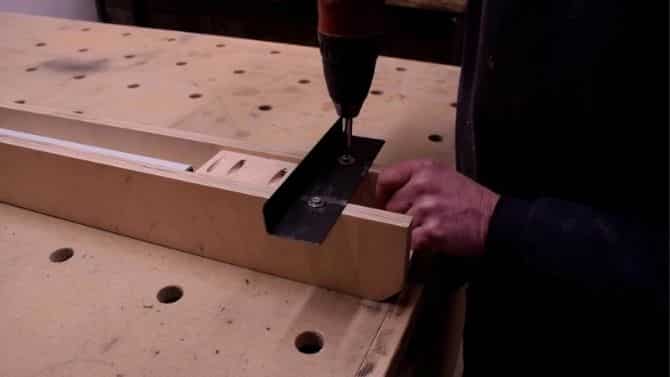
To make your new DIY table saw fence upgrade firmer, you can now screw a reinforcement block between the two sides at the bottom. This way, the side cannot tilt when you apply pressure to it. I attached the block invisibly by using pocket holes and screws.
I’m not going to discuss the clamping system I made in the first video here. The first system that I used for this had the disadvantage that the block always got in the way when I placed this sawing machine against my out-feed table. The second version I made is a lot better, and I will discuss it in more detail in the Makita Table saw fence upgrade, upgrade 1 clamping system, section down below. I attached the block invisibly by using pocket holes and screws.
DIY Table saw fence upgrade
After working with my new guide for some months I noticed that there was room for improvement. The upgrades I will discuss down below are also the upgrades you could see in the second video.
Differences
- The Makita mlt100 makes 4300 rotations per minute, whereas 2704 makes 4800 rotations per minute.
- The table surface of the Makita mlt100 is more spacious than 2704.
- The fence of the Makita mlt100 has alignment problems, whereas the fence system of 2704 is accurate.
- The Makita mlt100 has a sliding table on the job site jaw, whereas 2704 does not have.
- The Makita mlt100 has a plastic base, unlike 2704, which does not have a plastic one.
- The Makita mlt100 has a dust port that makes it compatible with a vacuum.
- The Makita mlt100 table saw makes noise, especially when starting, whereas 2704 does not make vibrations.
How to build your workshop on a budget?
Building a workshop may be challenging and requires a lot of trial and error.I know this since I was there as well.As a result of the ultimate small shop expertise that I’ve never seen anywhere else, I gained more insight into building a workshop.That’s how I could spend my money more wisely and save big bucks.
I really suggest it to all of my fellow DIYers and creators!
YOU CAN SPEND YOUR BUDGET ONLY ONCE Stop spending your budget on the wrong things!Let this fantastic training guide you and start saving money today.I already bought this personally and I have never seen anything better than this. Retail $129
Limited price: $39
I’LL GIVE YOU MORE INFO + FREE E-BOOK HERE
Read more related blogs to this one here:
MORE BUILDING A WORKSHOP BLOGS MORE WOODWORKING JIG BLOGS MORE FREE WOODWORKING PLANS BLOGS
I hope this information on how to make a table saw fence was helpful, and that this blog and video inspires you. Let me know in a comment below. Feel free to share this blog on Facebook, Pinterest, or other social media. You can do this by using the buttons below or at the top of the blog. It will be much appreciated. I’m looking forward to seeing you soon in another blog or video. Greetings,Christophe, founder of Christofix.comWoodworking | DIY | Home decoration
Download the plans here
Free forever. Check the 3d file options.
€8.99 – $10.5/mo
See all the details.
Adjust to your needs.
Take exact measurements.
Change from metric to imperial.
3D models of all plans uploaded during your membership.
GET STARTED!
Как запустить пилу после длительного простоя
Я не могу запустить бензопилу после длительного периода бездействия. Такие комментарии можно найти на форумах, посвященных ремонту и эксплуатации пыльцы. Давайте разберемся, как заводить бензопилу после длительного простоя.
Дело в том, что об успешном запуске после простоя необходимо заранее позаботиться и правильно подготовить пилу к хранению. В соответствии с инструкциями производителя слить топливо из бака перед хранением, затем запустить двигатель и сжечь топливо в топливной системе.
Подготовка необходима для того, чтобы мембраны карбюратора не слипались во время хранения. Выполнение этой простой операции позволит вам успешно запустить пилу после длительного хранения.
Через шесть месяцев после простоя запускать бензопилу намного проще, если в цилиндр залить 1-2 мл топливной смеси непосредственно перед запуском через отверстие для свечи зажигания. Это можно сделать с помощью шприца.
Conclusion
After reviewing these two models of power tool, and taking into account our own experience of working with wood, it is the DeWalt DW745 table saw that is our favourite. This is down to a number of things.
Firstly, the design of the DeWalt is superior to that of the Makita in that the guard and fence systems work better to provide a great rip capacity. The type of warranty the DW745 comes with is also better than the one that comes with the MLT100.
Furthermore, the DeWalt is much lighter and thus easier to pick up and transport. It also makes much more accurate and better quality cuts thanks to its highly powerful motor.
We hope you found this article of use and that it helped you to make a more informed decision as to which table saw to purchase. Now it is time for you to go out and buy one.
Upgrade 2 | Installing a T-track
To clamp some jigs and my push stick organizer to the DIY table saw fence upgrade, I attached a T-track rail on the outside. In order to make a slot in your guide, detach this side from the guide, so you could make a slot in it where the T-track fits in. To make this slot easily you can use my homemade Kerfmaker idea. First, you measure the thickness of the saw blade, and then you set the thickness of the slot you want to make.In this case, the width of the T-track.
By setting the Kerfmaker along with the guide, you can make perfect slots.
Afterward, you can update the slot with a chisel and mount the T-track with screws. Once the T-track is installed, you can assemble the new guide onto the original Makita table saw fence.
Почему бензопила не заводится?
Если вы все сделали по инструкции, а бензопила не запускается, значит что-то не так. Это может быть связано с некоторыми распространенными причинами: отсутствие искры; топливо не поставляется; воздушный фильтр забит. Итак, ниже мы предлагаем процедуру, которая поможет определить причину, по которой бензопила не запускается.
READ Makita MLT 100 Table Saw, Обзор пользователей
Процедура, если ваша бензопила не запускается
Первое, что нужно отметить, если вы не запускаете бензопилу. Не затягивайте винты на карбюраторе. Если вы не являетесь экспертом, вы все равно не сможете самостоятельно что-то отрегулировать, и вы не сможете запустить бензопилу.
Выполните следующие действия, чтобы запустить бензопилу в указанном порядке, начиная со следующего номера, только если предыдущий не помог.
Для начала попробуйте оставить бензопилу в покое на 5-10 минут. Возможно, что свеча была заполнена во время намотки. Такое бывает. Затем попробуйте начать снова в соответствии с инструкциями.
Снимите крышку с бензопилы, снимите воздушный фильтр и попробуйте запустить без него. Если фильтр загрязнен, его следует промыть в мыльной воде и высушить или заменить на новый.
Выкрутите свечу зажигания из бензопилы. Проверьте на наличие искр. Если искры нет, попробуйте поставить новую свечу. Если искра не появляется, это означает, что блок зажигания поврежден и пилу необходимо транспортировать для ремонта. Однако визуальное наблюдение за искрой не означает, что блок зажигания находится в хорошем состоянии. Если возникает искра, но бензопила по-прежнему не работает, выполните следующие действия в списке.
Если есть искра, но свеча зажигания влажная, поверните бензопилу, чтобы слить лишний газ из баллона, если он там скопился. Потяните стартер свечи зажигания 10-15 раз, чтобы проветрить камеру сгорания. Зажгите свечу и затяните ее обратно, но лучше заменить ее новой, если она есть. Попробуйте начать снова согласно инструкции.
Если свеча сухая, поместите один или два кубика газовой смеси в шприц и заполните его в цилиндр. Попробуйте запустить бензопилу. В карбюраторе может быть небольшое пятно, препятствующее попаданию топлива в камеру сгорания
Возможно, что это будет выводиться потоком, генерируемым после запуска бензопилы, добавляя топливо непосредственно в цилиндр.
Открутите глушитель и снимите его, соблюдая осторожность, чтобы не повредить прокладку между глушителем и двигателем. Попробуйте запустить без глушителя и воздушного фильтра
Сняв глушитель, вы можете осмотреть поршень внутри бензопилы. Если на стенках цилиндра или поршня имеются заусенцы или гнезда, или кольцо на поршне скрыто заусенцами, вам придется очень расстраиваться, потому что это означает, что поршень поврежден или изношен. Это обычно происходит, когда масло добавляется в топливную смесь. В этом случае вам придется обратиться в сервисную службу и, возможно, подумать о покупке новой бензопилы, поскольку замена поршня. Довольно дорогая операция.
Таким образом, в этой статье мы обсудили, как запустить бензопилу «по инструкции», а также что делать, если бензопила не запускается. Мы надеемся, что вы найдете эти советы полезными.
Источник
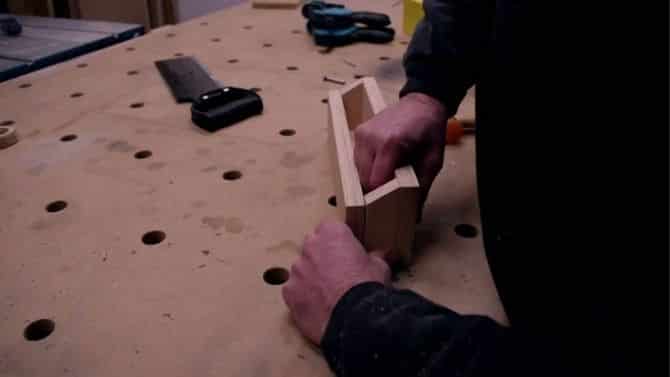
Upgrade 1 | Clamping system
The clamping system I made in the first video could be better.The block I used was too big and always got in the way when I wanted to place the saw against the out-feed table. That is why I replaced the wooden block with an L-shaped piece of metal. The metal I used for this is about 20 cm (7.87”) long. To attach this metal part to the DIY table saw guide, drill two holes at the same width as the sides of the guide. The holes can be much larger than the screws, so you can adjust the clamp.In that way, the new guide fits optimally on the tabletop.

Now attach this metal clamp to the bottom of the DIY table saw fence with screws and washers. Do not tighten yet so that you can later adjust the clamping system.


Place the new guide on the table-top, but do not clamp it yet. Now go to the metal clamp and push it against the tabletop.Now screw it tightly. When you tighten the guide, this metal clamp will press against the tabletop.Like that, the DIY table saw fence can no longer move. Mission accomplished! You have now converted the weak table saw guide into a sturdy and reliable one.
Upgrade 1 | Clamping system
The clamping system I made in the first video could be better.The block I used was too big and always got in the way when I wanted to place the saw against the out-feed table. That is why I replaced the wooden block with an L-shaped piece of metal. The metal I used for this is about 20 cm (7.87”) long. To attach this metal part to the DIY table saw guide, drill two holes at the same width as the sides of the guide. The holes can be much larger than the screws, so you can adjust the clamp.In that way, the new guide fits optimally on the tabletop.
Now attach this metal clamp to the bottom of the DIY table saw fence with screws and washers. Do not tighten yet so that you can later adjust the clamping system.
Place the new guide on the table-top, but do not clamp it yet. Now go to the metal clamp and push it against the tabletop.Now screw it tightly. When you tighten the guide, this metal clamp will press against the tabletop.Like that, the DIY table saw fence can no longer move. Mission accomplished! You have now converted the weak table saw guide into a sturdy and reliable one.

DeWalt DW745 Table Saw
Table of Contents
This is a great table saw for those individuals wanting a middle of the road power tool that comes backed with lots of good functions and features. It is appreciated by all that use for its durability, accuracy and its portability.
Armed with a 15 amp motor, the table saw has lots of torque meaning it can easily cut through lumber and even hard woods. The 10 inch cutting blade can reach a maximum of 3,850 RPM of speed. With the fence on the DeWalt you are able to cut through a work piece as wide as 20 inch.
The fence has a rack and pinion, which means it can be precisely and quickly adjusted. Its telescopic function allows for the rails to protrude a further 20 inch. The maximum cutting depth at 90 degrees is over 3 inch and at 45 degrees is over 2 inch.
The DW745 weighs just 66 pounds and can be carried from job to job easily thanks to the base having a firm grip. DeWalt have added on board memory to the table saw, which means gaining access to the Site Pro Protection components much easier.
The surface of the table on this power tool has been coated in a special solution to decrease the level of friction and thus improve the cutting quality. The base of the roll cage on the DeWalt is made of metal in order to add a greater level of durability and stability to the power tool than plastic would provide.
Specifications
- A 1,850 watt motor
- A 15 amp motor
- 120 volts
- Up to 3,850 RPM of speed
- A 10 inch cutting blade
- A maximum cutting depth of over 3 inch at 90 degrees and over 2 inch at 45 degrees
- A 2.5 inch dust port
- A total weight of 66 pounds
Step 2 | Making the top of the DIY table saw fence
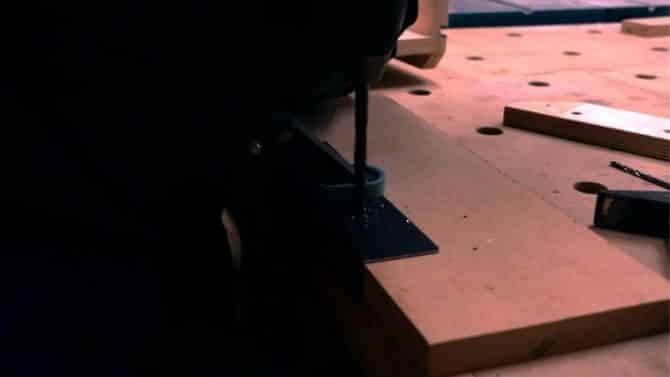
The top of the guide is also the part that ensures that the new guide can be attached to the original one. To let the new guide fit on the original one, measure the distance from the side to the center of the slot in the original guide.You can transfer this distance to the new part.

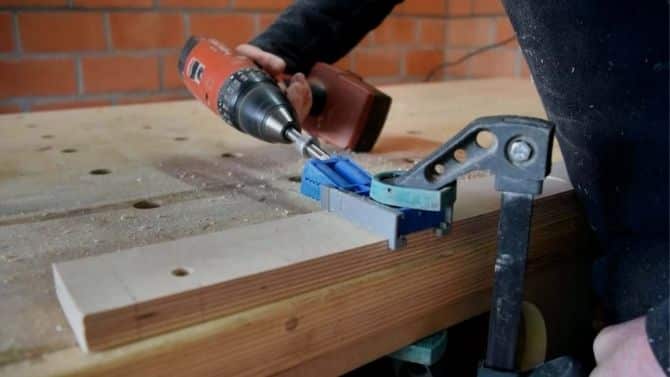
You can now drill a hole at the marked location. First, drill a hole with the same depth of a washer and a nut with a speed drill or Forstner bit.In this way, the washer and nut will be countersunk during mounting. After drilling the larger hole, drill a hole completely through the wood. Use a drill with the same diameter as the bolt.
Because I did not want screws in the DIY table saw fence on the side that faces the saw blade, I used pocket holes. I made these pocket holes at the bottom of this part. That way the pocket holes will be invisible in the end result and dust cannot collect in the pocket holes.
If you consider buying a pocket hole system, I can recommend this Pocket hole R3 Jr starter package from Kreg. It is not a big investment, and you can do a lot of projects with this system.I’m happy to have this in my workshop.
Step 2 | Making the top of the DIY table saw fence
The top of the guide is also the part that ensures that the new guide can be attached to the original one. To let the new guide fit on the original one, measure the distance from the side to the center of the slot in the original guide.You can transfer this distance to the new part.
You can now drill a hole at the marked location. First, drill a hole with the same depth of a washer and a nut with a speed drill or Forstner bit.In this way, the washer and nut will be countersunk during mounting. After drilling the larger hole, drill a hole completely through the wood. Use a drill with the same diameter as the bolt.

Because I did not want screws in the DIY table saw fence on the side that faces the saw blade, I used pocket holes. I made these pocket holes at the bottom of this part. That way the pocket holes will be invisible in the end result and dust cannot collect in the pocket holes.

If you consider buying a pocket hole system, I can recommend this Pocket hole R3 Jr starter package from Kreg. It is not a big investment, and you can do a lot of projects with this system.I’m happy to have this in my workshop.
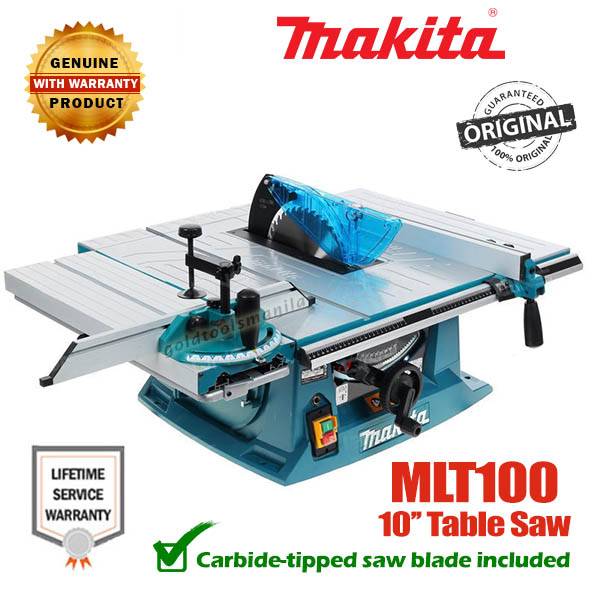
Makita MLT100 Table Saw
The table saw comes with a storage facility for tools such as the push bar, fences, extra cutting blades, footprint etc. The MLT100 comes with a 10 inch cutting blade and spins at a maximum RPM of 4,500. This is thanks to its powerful 1,500 watt motor.
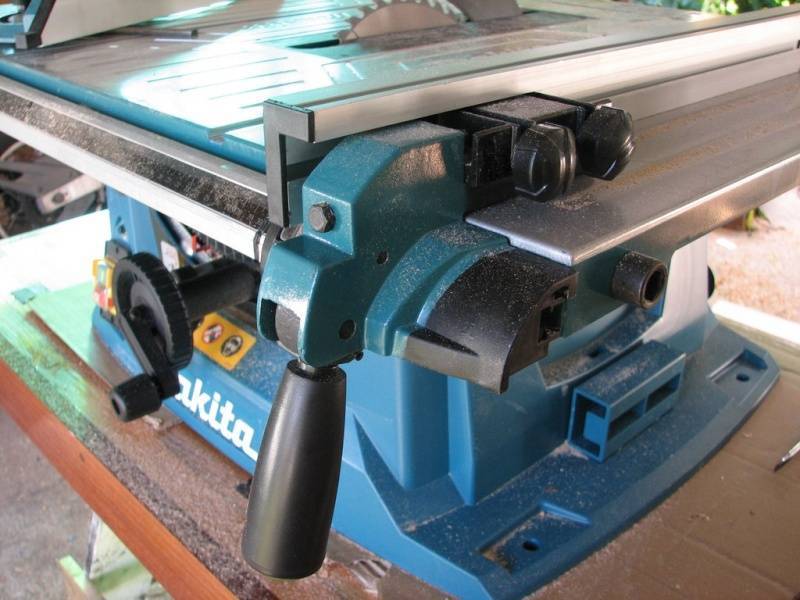
In order to adjust the angle of the cutting blade simply release the lock and then turn the knob. This is different to most other table saws currently available on the market that instead utilize a disengage lock and then manual adjustment is required.
The angle of the cutting blade can be made small to give a great level of convenience and precision. The power tool creates very few vibrations on the blade, which again helps with making precision cuts. The MLT100 boasts a maximum cutting depth of over 3 inch at 90 degrees and 2.5 inch at 45 degrees.
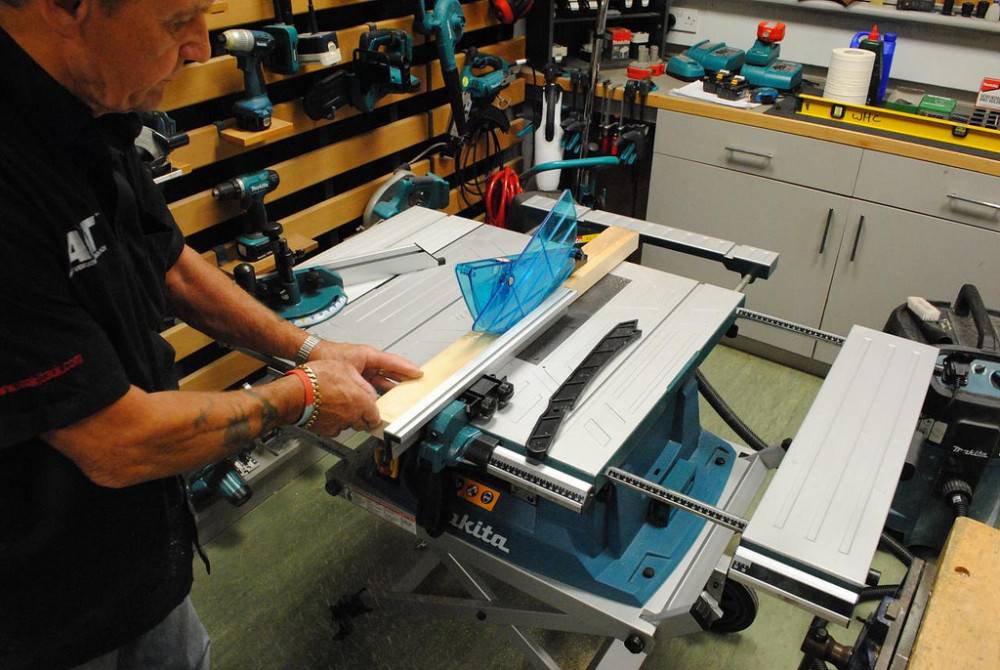
The table saw has a long fence, along with a clip to hold your work piece. The clamp on the gauge can be used for pushing your work piece through the cutting blade or for sliding beds.
On this particular model the miter gauge does not line up with the slots on the saw bed, as they are fuller than the gauge’s rail. The entire power tool is covered by a 3 year warranty, which brings peace of mind that you will not lose out if it was to malfunction or completely break altogether.
Запустите бензопилу в соответствии с инструкциями
Различные бензопилы могут быть запущены по-разному. Мы проанализируем два наиболее популярных механизма запуска бензопил, которые существуют сегодня. Например, возьмите бензопилы Stihl MS 180 и Echo CS-352ES. Если у вас есть другая марка бензопилы, просто попробуйте начать по аналогии, потому что, скорее всего, у вас есть такой же или похожий механизм.
Прежде чем приступить к описанию процесса запуска, хочу отметить, что для некоторых бензопил в инструкциях сказано, что перед запуском бензопилы необходимо включить тормоз аварийного останова. Они говорят, что это безопаснее. Однако запускать бензопилу с помощью стационарного тормоза сложнее, поэтому лучше ее разблокировать. Если вы все сделаете с умом, бензопила ничего не сделает при запуске. Если вы боитесь, что, не пытаясь запустить тормоз бензопилы, он может повредить вам, тогда лучше вообще не использовать этот инструмент.
Итак, начнем со Stihl MS 180.
Первое, что нужно сделать перед запуском этой бензопилы, это переместить рычаг управления в нижнее положение (рис. 1)
Обратите внимание, что этот рычаг перемещается к нижней части бензопилы только при нажатии кнопки газа. Поэтому, удерживая кнопку дроссельной заслонки, опустите рычаг вниз
Таким образом, мы закрываем заслонку в карбюраторе и фиксируем газ на бензопиле в нажатом положении.
READ Как Правильно Пилить Ручной Циркулярной Пилой
Рис. 1 После этого, чтобы запустить бензопилу, вы начинаете энергично перемещать рукоятку стартера, пока не услышите, что бензопила пыталась запустить, а затем остановиться. После этого переместите рычаг, чтобы отрегулировать положение демпфера на бензопиле на один шаг вверх (рис. 2).
Рис.2
- В этом положении снова потяните ручку стартера, пока не запустится бензопила. В то же время, если он запущен, он сразу же начнет работать на высоких скоростях, заблокировав ручку газа в нажатом положении.
- Затем, как только вы нажмете и отпустите кнопку бензина на бензопиле. Рычаг управления клапаном автоматически опустится в рабочее положение (рис. 3), и скорость бензопилы упадет. Теперь вы можете работать.
Рис.3
Если вам нужно запустить бензопилу с подогревом, вам просто нужно поставить рычаг в положение, показанное на рис. 3, и вы можете начать.
Чтобы остановить двигатель бензопилы, поднимите рычаг управления демпфером в верхнее положение (рис. 4).
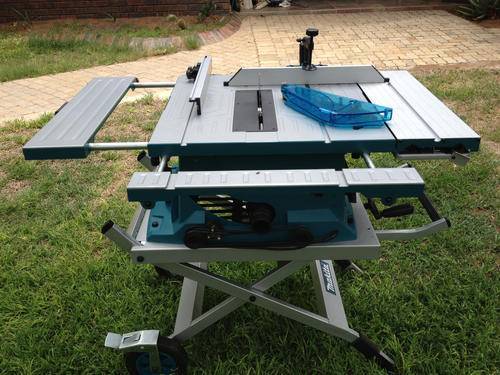
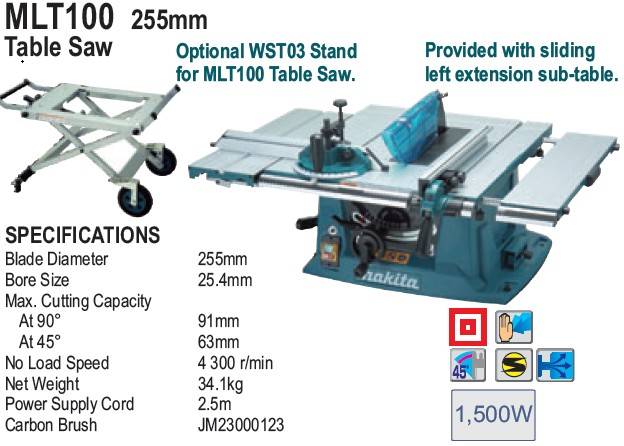
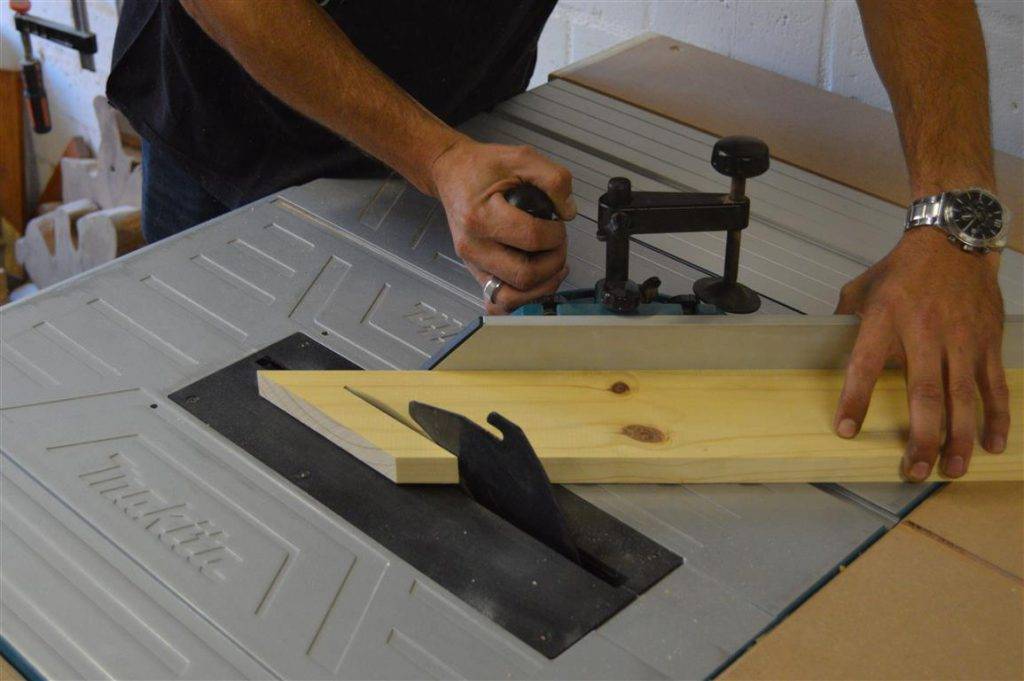
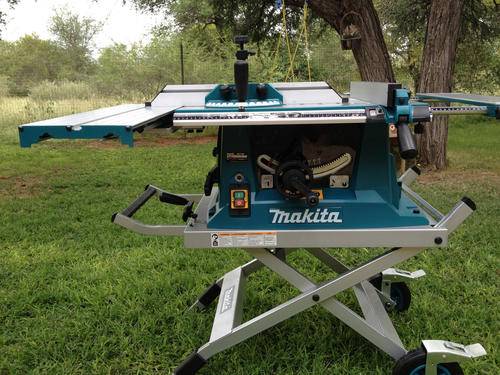
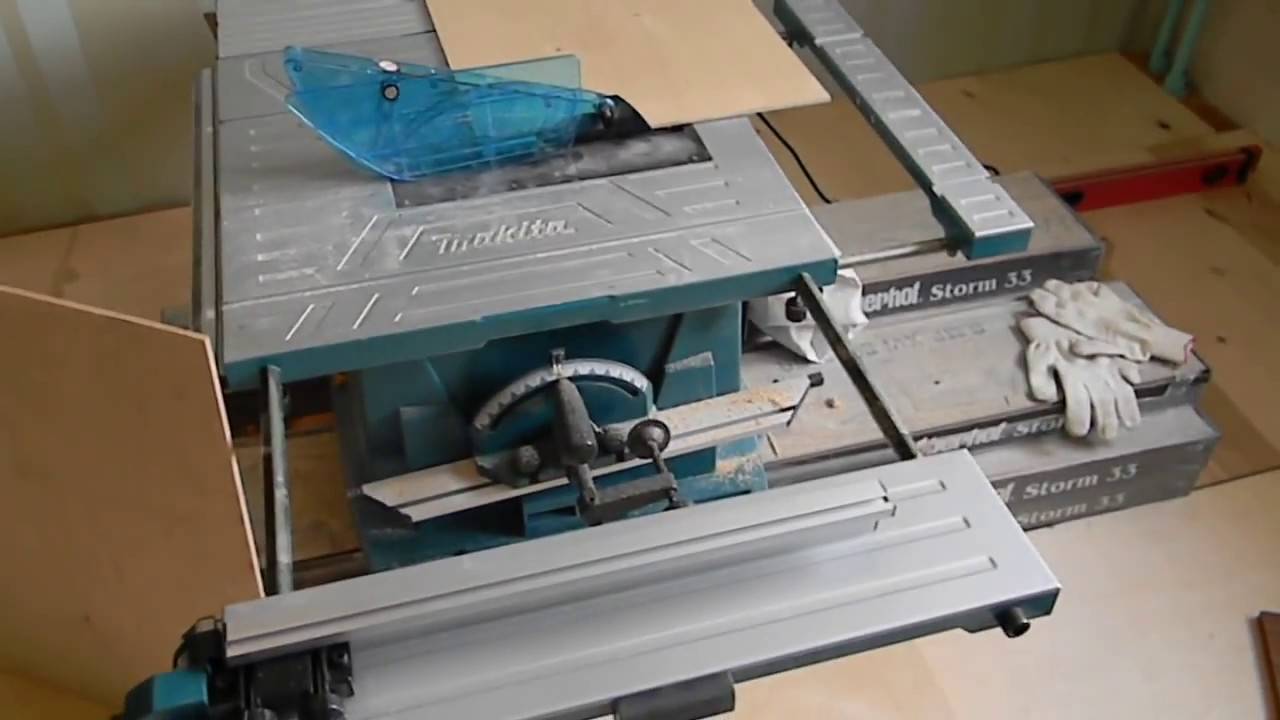
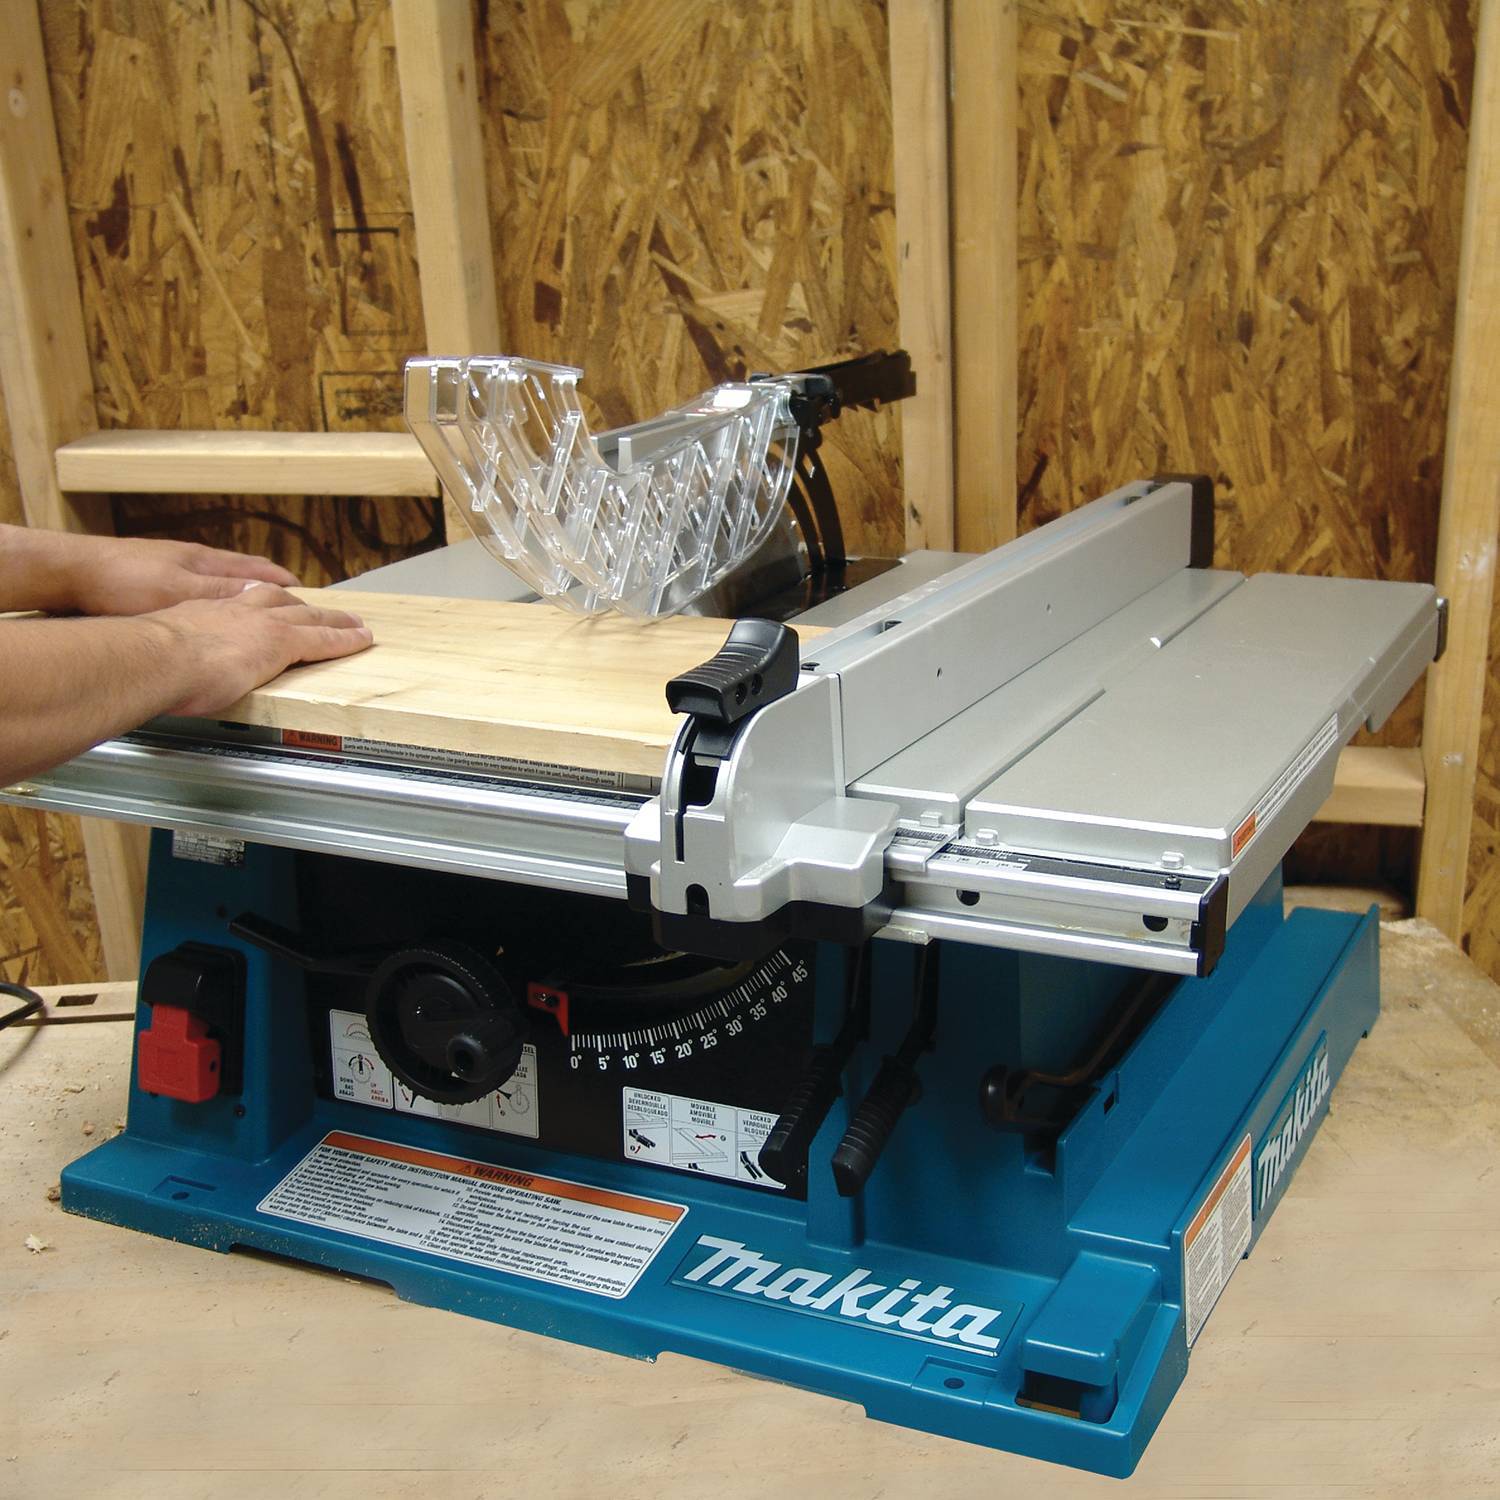
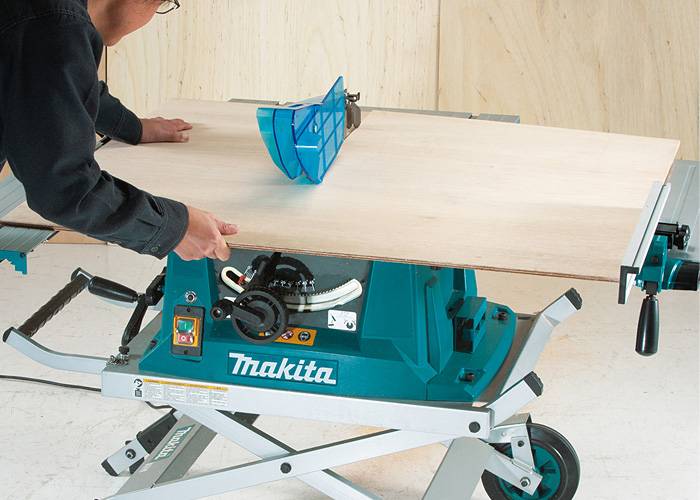
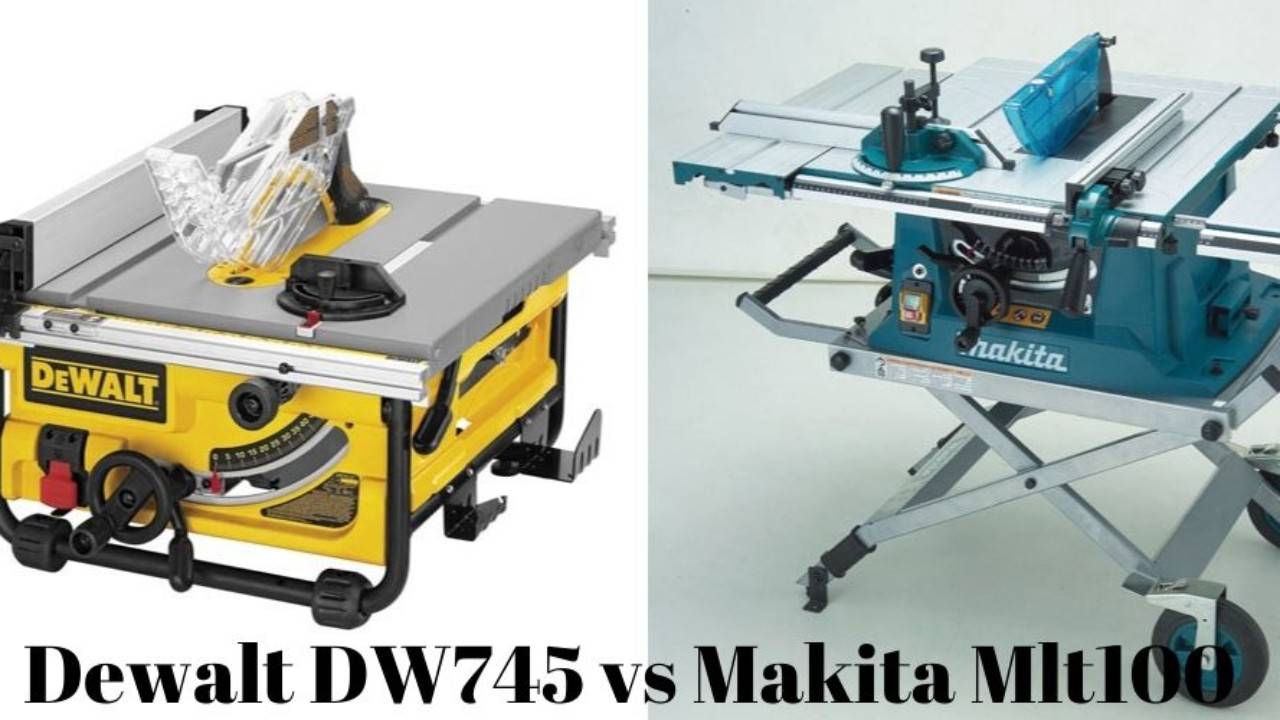
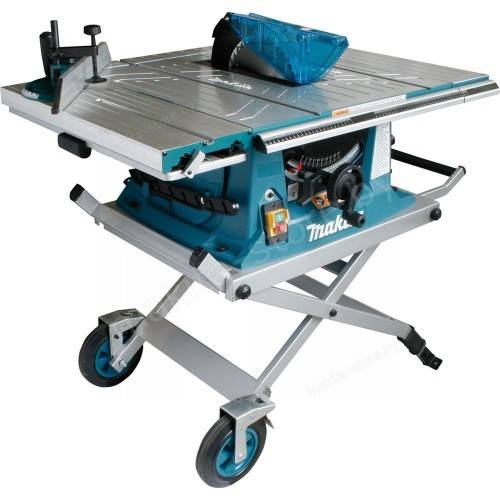
Рис.4
Теперь мы проанализируем второй второй механизм, который позволяет запустить бензопилу.
Во-первых, перед попыткой запуска включите зажигание, переместив выключатель или выключатель бензопилы в соответствующее положение (рис. 5).
Рис. 5 Затем нажмите праймер несколько раз для замены (Рис. 6). Бензин закачивается в него, а затем нажмите еще 3-5 раз. Если у вас есть бензопила без грунтовки, переходите к следующему шагу.
Рис. 6 Теперь на бензопиле полностью вытащите рычаг, чтобы отрегулировать положение створки (рис. 7). В некоторых бензопилах для его запуска этот рычаг можно растянуть только при нажатии кнопки газа, а сама кнопка газа заблокирована в нажатом положении. Другим не нужно нажимать кнопку газа. Однако в этом случае газ на бензопиле фиксируется автоматически или не фиксируется вообще.
Рис. 7
Затем потяните ручку стартера, пока бензопила не попытается запустить и остановить. Затем нажмите рычаг, чтобы отрегулировать положение демпфера до упора на бензопиле, и снова потяните ручку стартера, пока не запустится бензопила. В некоторых случаях, чтобы запустить бензопилу, рычаг перекрытия нужно потянуть только наполовину, и он должен быть полностью вытянут после запуска бензопилы.
Стационарные газовые бензопилы имеют высокие скорости после запуска. Там, где нет фиксации, скорость низкая. В последнем случае из-за низкой скорости бензопила обычно задерживается на короткое время. В этом случае, не регулируя ничего, мы перезапускаем бензопилу, и это может происходить несколько раз, пока бензопила немного не прогреется и больше не сможет сохранять скорость и не задерживаться.
Чтобы запустить горячую бензопилу, просто включите зажигание, переместив соответствующий тумблер, и вы можете потянуть за ручку стартера.
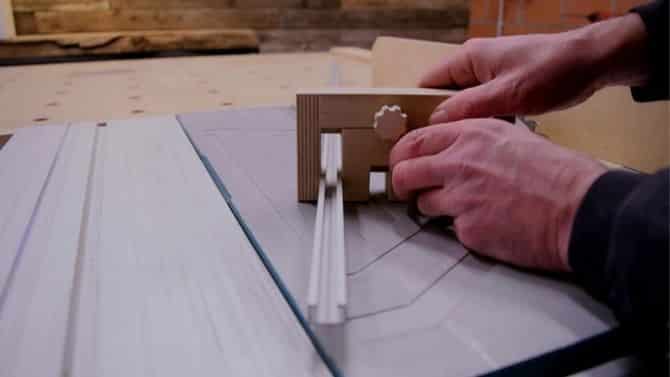
Upgrade 3 | Making a push stick organizer
Because I would always have my push stick at hand when making cuts with this saw, I made this push stick holder. I can attach this to the table saw guide via the T-track. For this, you need to make a box of plywood in which your push stick fits.
At the back, you need to place two hexagon wood bolts at the same height as the T-track of the table saw guide. Like that, you can easily attach the push stick holder and move or detach it if necessary.
In the same way, I have adapted other jigs, such as my feather board, so that they are very easy to mount on this DIY table saw guide. You can do the same with your jigs.
How to build your workshop on a budget?
Building a workshop may be challenging and requires a lot of trial and error.I know this since I was there as well.As a result of the ultimate small shop expertise that I’ve never seen anywhere else, I gained more insight into building a workshop.That’s how I could spend my money more wisely and save big bucks.
I really suggest it to all of my fellow DIYers and creators!

YOU CAN SPEND YOUR BUDGET ONLY ONCE Stop spending your budget on the wrong things!Let this fantastic training guide you and start saving money today.I already bought this personally and I have never seen anything better than this. Retail $129
Limited price: $39
 I’LL GIVE YOU MORE INFO + FREE E-BOOK HERE
Read more related blogs to this one here:
MORE BUILDING A WORKSHOP BLOGS
MORE WOODWORKING JIG BLOGS
MORE FREE WOODWORKING PLANS BLOGS
I hope this information on how to make a table saw fence was helpful, and that this blog and video inspires you. Let me know in a comment below. Feel free to share this blog on Facebook, Pinterest, or other social media. You can do this by using the buttons below or at the top of the blog. It will be much appreciated. I’m looking forward to seeing you soon in another blog or video. Greetings,Christophe, founder of Christofix.comWoodworking | DIY | Home decoration

Download the plans here
Free forever. Check the 3d file options.
€8.99 – $10.5/mo
See all the details.
Adjust to your needs.
Take exact measurements.
Change from metric to imperial.
3D models of all plans uploaded during your membership.
GET STARTED!
Overview of the Makita 2704
See The Current Price
The main feature of the Makita 2704 is the powerful 1650 Watt motor. It has high rigidity that makes accurate cutting possible. The table is extendable, and the fence gives you a large cutting board. It comes with easy and scales that help you prepare your cutting pieces of equipment.
The quick-release guide rail makes it easy for you to operate the table saw. The guide rail is steady, and the rip fence slides on it with accurate cutting. The electronic brake allows you to make an emergency stop when something wrong with the machine. The table saw comes with a fitted electronic soft start and anti-restart function. It comes with a 260mm blade.
The maximum cutting height at 90 degrees is 93mm. When at 45 degrees, it runs up to 64mm. It runs at 4800rotations per minute. It weighs up to 34.9kg. The package includes the Makita 2704 table saw, TCT blade, rip fence, 22mm wrench, 19mm offset wrench, a push stick, and a Bevel guide rule. It has a large On/Off switch button that you cannot mistakenly press the wrong button.